Quick Start
What it's for
Quick Start is the front door to Trust Central. Rather than dropping you into a blank console, it lays out a guided path for each product — Vision Score and eKYC — so a new account (or a new team member) can go from "what does this actually do" to "live in production" without needing a kickoff call for every step. It's also where you can see, at a glance, how far along your organization already is — send new team members here first, since it's a faster orientation than reading the rest of this guide cover to cover.
What you can see
Vision Score path: five steps from demo to production
A visual explainer opens the section: how a selfie submitted by an applicant flows through Vision Score's AI analysis and comes back as a 0–100 score to your system, with illustrative risk bands (roughly, 70–100 low risk/approve, 40–69 medium risk/review, 0–39 high risk/reject — your actual thresholds are configured separately, see Vision Score Dashboard and Channels).
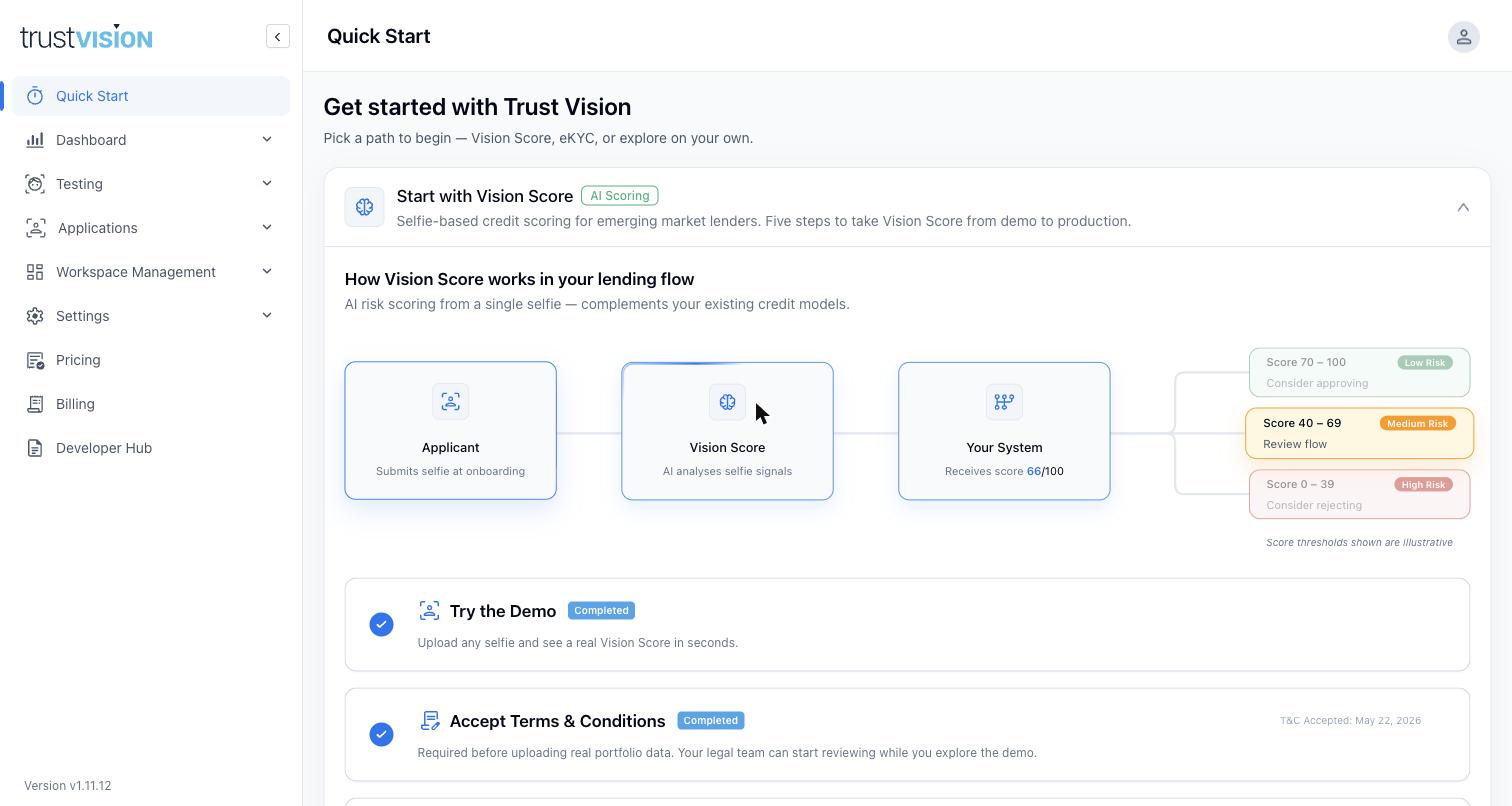
Below that, a five-step checklist tracks your actual progress, each step marked Completed or as the current Next Step — a natural project plan for onboarding a new portfolio, with a clear owner at each stage: product/risk, legal, data/risk, commercial, and engineering respectively.
- Try the Demo — upload any selfie and see a real Vision Score in seconds. No account setup required.
- Accept Terms & Conditions — required before you can upload real portfolio data. Your legal team can review this in parallel while others explore the demo.
- Run Your Backtest — validate score lift against your own real portfolio, up to 100,000 images per batch. See Backtesting & Fine-Tuning.
- Select a Plan — choose a plan sized to your portfolio volume to activate your production API key. See Billing & Plans.
- Go Live via API — integrate Vision Score into your onboarding flow; TrustVision positions this as achievable in under a day given a working plan and API key.
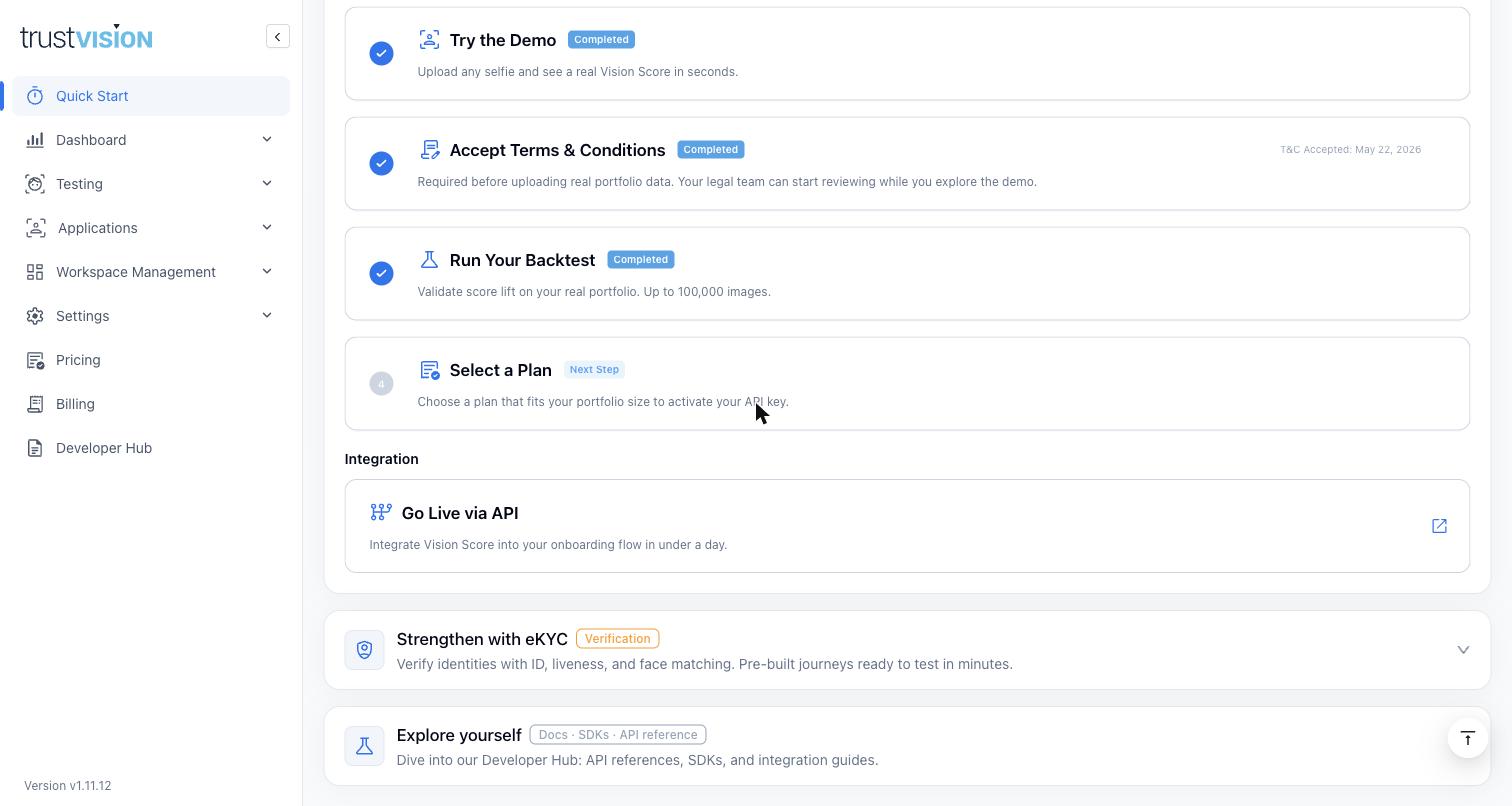
eKYC path: "Strengthen with eKYC"
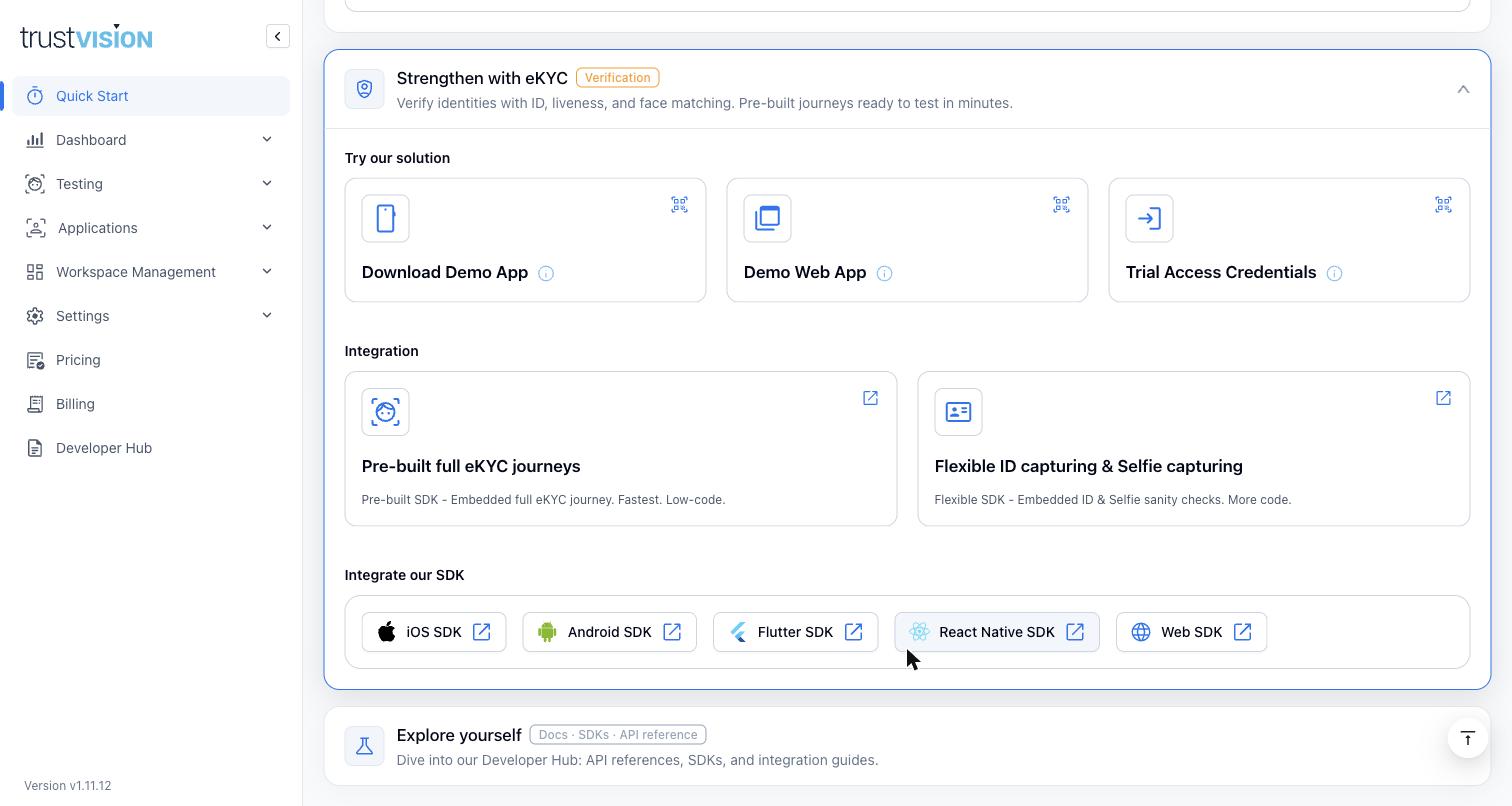
A second, expandable section pitches eKYC as a complement to Vision Score — verifying an applicant's actual identity (document, liveness, face match) alongside or instead of just scoring their selfie. It's a standalone starting point too: you don't need to finish the Vision Score steps first to explore or integrate eKYC. Expanding it reveals three ways to experience the product hands-on, two integration approaches, and the SDK list:
Try our solution:
- Download Demo App — a mobile app you install to walk through the eKYC journey yourself.
- Demo Web App — the same journey in a browser, no install required.
- Trial Access Credentials — credentials to test the API/SDK directly rather than just clicking through a demo UI.
Integration — two approaches, matching the distinction drawn between the two ways to integrate eKYC:
- Pre-built full eKYC journeys — the embedded, ready-made verification journey (what this guide set calls eKYC Platform elsewhere) — fastest to integrate, low-code, because the sequence of checks is already configured for you.
- Flexible ID capturing & Selfie capturing — a more flexible SDK for ID and selfie sanity checks (closer to eKYC Core) — more integration work, but more control over how you orchestrate each check yourself. Default to the pre-built journey unless you have a specific reason to take this route.
Integrate our SDK — direct links to the iOS, Android, Flutter, React Native, and Web SDKs.
Explore yourself
A third section links out to the Developer Hub (API references, SDKs, integration guides) for teams who'd rather read full technical documentation than follow a guided path.
Related areas
- For what happens once you've gone live, see Vision Score Dashboard and eKYC Dashboard.
- For validating performance before selecting a plan, see Backtesting & Fine-Tuning.
- For plan tiers and quota, see Billing & Plans.
- For where a channel's verification journey is actually configured after you pick an integration approach, see Channels and Workflows.