- Android SDK

- iOS SDK
- Flutter SDK
- React Native SDK
- API Client Libraries
- eKYC Platform
- Integration Case Studies
- Behavioral
- TS eKYC/FA App

Version ≥ 5.x.x
Install
CDN
<script src="https://vision-cdn.trustingsocial.com/tvweb-sdk/<VERSION>/build/tvweb-sdk.standalone.min.js"></script>
NOTE:
- From version 5.22.0+, the SDK will load assets/resources from the Trusting Social CDN by default. If you want to self-host the SDK assets/resources, please refer to this section.
- Using
jsdelivr/unpkgCDN is not recommended as production builds may be affected by the stability of the CDN. - When using
jsDeliver/unpkgCDN,@latestversion is not recommended as production builds will be directly affected by version updates.
Setup using script tag
- You can add the script tag to the
public/index.htmlfile of your project. - Or dynamically add the script tag to the head of your HTML file.
- Applied for all frameworks (React, Angular, Vue, etc.)
<!-- add script to public/index.html -->
<script src="https://vision-cdn.trustingsocial.com/tvweb-sdk/<VERSION>/build/tvweb-sdk.standalone.min.js"></script>
Usage
Vanilla JS
const tv = new TVWebSDK.SDK({
  container: document.getElementById("container"),
  lang: "vi",
  enableAntiDebug: false,
});

tv.runPreloadEKYCResources();
React
import React, { useEffect, useRef } from "react";
function TVSDKExample() {
  const sdkInstanceRef = useRef(null);

  useEffect(() => {
    sdkInstanceRef.current = new TVWebSDK.SDK({
      container: document.getElementById("web-sdk-container"),
      lang: "vi",
      enableAntiDebug: false,
    });

    sdkInstanceRef.current.runPreloadEKYCResources();
  }, []);

  return <div id="web-sdk-container" />;
}
Angular
// config
// in angular.json, add this to script
"scripts": [
  ...
  "node_modules/@tsocial/tvweb-sdk/build/tvweb-sdk.standalone.min.js"
  ...
]
// usage
declare var TVWebSDK: any;
// the rest example please follow Vanilla JS above
Vue
// Please follow Vanilla JS above
Constructor
Example:
const tv = new TVWebSDK.SDK({
  container: document.getElementById("container"),
  lang: "vi",
  enableAntiDebug: false,
});
| Required | Type | Default | Description | |
|---|---|---|---|---|
container | yes | DOM Element | DOM element to render the UI | |
lang | no | LanguageCode | en | language to display (en or vi) |
assetRoot | no | string | Default value is Trusting Social's CDN | where to load images/icons. |
resourceRoot | no | string | Default value is Trusting Social's CDN | Since version 5.7.8+, use this in case the client wants to bundle all resources from a root URL. |
enableAntiDebug | no | boolean | true | if enabled, sdk will try to prevent users from opening devtools in browsers |
customUrls | no | object | default custom urls | Besides assets, SDK also needs to load external resources (models, libraries...). This param allows to customize where to load those resources. |
themeVersion | no | string | v2 | This allows you to change between SDK available themes. Please refer to this section. |
country | no | string | vn | country |
enableVoice | no | boolean | false | Available from version 5.25.0. Enable voice instructions for SDK, only applied for Read ID Card, Flash Liveness and Passive Liveness V2 |
Note:
For locale customization with lang and country, please refer to this section.
Default custom urls
The client can customize resource urls via customUrls parameter.
How to customize these urls by your CDN. Please reference here
const customUrls = {
  blazefaceModelUrl:
    "https://storage.googleapis.com/tfhub-tfjs-modules/tensorflow/tfjs-model/blazeface/1/default/1/model.json",
  opencvUrl:
    "https://cdn.jsdelivr.net/npm/@tsocial/[email protected]/libs/opencv-4.6.0.js",
  idCardModelUrl:
    "https://cdn.jsdelivr.net/npm/@tsocial/[email protected]/models/id-card/tflite/model-v3.tflite",
  wechatQRModelsUrl:
    "https://cdn.jsdelivr.net/npm/@tsocial/[email protected]/wechat_qr_models/",
  tfScriptUrls: {
    tfUrl:
      "https://cdn.jsdelivr.net/npm/@tensorflow/[email protected]/dist/tf.min.js",
    tfBackendWasmUrl:
      "https://cdn.jsdelivr.net/npm/@tensorflow/[email protected]/dist/tf-backend-wasm.js",
    tfBackendCpuUrl:
      "https://cdn.jsdelivr.net/npm/@tensorflow/[email protected]",
    tfBackendWebGlUrl:
      "https://cdn.jsdelivr.net/npm/@tensorflow/[email protected]",
    tfLiteUrl:
      "https://cdn.jsdelivr.net/npm/@tensorflow/[email protected]/dist/tf-tflite.min.js",
    blazefaceScriptUrl:
      "https://cdn.jsdelivr.net/npm/@tensorflow-models/[email protected]",
  },
};
// And pass it to SDK via init method
const tv = new TVWebSDK.SDK({
  // ...
  customUrls: customUrls,
});
Notes for self-hosted decision
For these specific resources blazefaceModelUrl, opencvUrl, idCardModelUrl, tfUrl, tfBackendWasmUrl, tfBackendCpuUrl, tfBackendWebGlUrl, tfLiteUrl, blazefaceScriptUrl and SDK's resources (JS lib and assets):
Please contact the administrator to get the full resources tree and we will help the client to publish it to the client's CDN.
Note: We recommend the client use this option.
- The client can host the resources of Web SDK together with your website on your CDN.
- The client can control performance based on your traffic from your Website/CDN.
For example: after the resources are ready on your CDN. please use these settings.
const myCdnUrlPrefix = "<YOUR CDN URL>/";
const customUrls = {
  blazefaceModelUrl: `${myCdnUrlPrefix}models/1.0.0/blazeface/model.json`,
  opencvUrl: `${myCdnUrlPrefix}opencv/4.6.0/cv.js`,
  idCardModelUrl: `${myCdnUrlPrefix}models/1.0.0/id_card/tflite/model-v3.tflite`,
  wechatQRModelsUrl: `${myCdnUrlPrefix}models/1.0.0/webchat_qr/`,
  tfScriptUrls: {
    tfUrl: `${myCdnUrlPrefix}tfjs/3.20.0/tf.min.js`,
    tfBackendWasmUrl: `${myCdnUrlPrefix}tfjs/3.20.0/backend-wasm.js`,
    tfBackendCpuUrl: `${myCdnUrlPrefix}tfjs/3.20.0/backend-cpu.js`,
    tfBackendWebGlUrl: `${myCdnUrlPrefix}tfjs/3.20.0/backend-webgl.js`,
    tfLiteUrl: `${myCdnUrlPrefix}tflite/0.0.1-alpha.8/tflite.min.js`,
    blazefaceScriptUrl: `${myCdnUrlPrefix}blazeface/0.0.7/bf.js`,
  },
  idCardModelUrls: {
    model_vn: `${myCdnUrlPrefix}models/1.0.0/id_card/tflite/id_card_detector_v2_lite.tflite`,
    model_ph: `${myCdnUrlPrefix}models/1.0.0/id_card/tflite/ph_card_model.tflite`,
  },
};
const sdkVersion = "5.12.4";
const tv = new TVWebSDK.SDK({
  // other setting as SDK defined
  assetRoot: myCdnUrlPrefix + "tvweb-sdk/" + sdkVersion + "/assets",
  customUrls: customUrls,
});
Since version 5.7.9+: Client can use this option if the client host all resources from a CDN
const myCdnUrlPrefix = "YOUR CDN URL";
const sdkVersion = "5.12.4";
const tv = new TVWebSDK.SDK({
  // other setting as SDK defined
  assetRoot: myCdnUrlPrefix + "tvweb-sdk/" + sdkVersion + "/assets",
  resourceRoot: myCdnUrlPrefix, // only available from 5.7.9+
});
Read ID Card
readIDCardUIOnly
To start a UI flow where we can get id card info from users (images, QR code, recorded videos...)
Params
| Required | Type | Default | Description | |
|---|---|---|---|---|
| clientSettings | yes | object | Settings to run SDK features. This object should have the same shape as settings from this api | |
| onError | yes | function | Callback when errors happen. An error object will be returned. | |
| steps | no | IDCardStep[] | TVWebSDK.defaultReadIDCardSteps | UI flow configuration. Check IDCardStep |
| allowedCardTypes | no | (string | CardType)[] | [] | (Only works if enabled in settings) SDK only allows certain card types. E.g. if it has value of ['vn.cccd'], SDK will alert that only CCCD card is allowed. Default [] or not pass in this value, SDK will accept all card types. Note: currently only apply for Vietnam from version 5.16.3, available values are listed below |
| detectIdCard | no | function | () => Promise.resolve({ card_label: '' }) | This function receives { cardType, image: { blob, encrypted: { hex: <encrypted file encoded in hex string format> } }, cardSide } and should return or resolve to this object { card_label: <CARD_LABEL>}. Api to detect card label can be found here |
| onStepDone | no | async function | Empty function | Callback every time users complete a step. onStepDoneResult will be returned. When you handle api in this function, please use async funtion (return Promise or using await) to wait the api complete before SDK move to next step, otherwise SDK will process to next step while the api is loading. |
| outputEncryptionSettings | no | object | { key: '' } | If key is provided, output files will be encrypted and returned via encrypted field. Please see here. |
| logCredentials | no | object | {} | Config for tracking user's behavior while using |
| title | no | string | '' | Only available for some custom build. Title of IDCard screen. |
| customTexts | no | object | {} | Only available from SDK version 5.21.0. Please refer to this section |
| onClose | no | function | Empty function | Callback when users click the X button |
| flipVideoHorizontal | no | boolean | null | Flip video horizontally. Available since version 5.19.0 |
Allowed card types
Can be either below list of predefined string or CardType object type:
CardTypeobject can be used to extend new card types that are not in the predefined list.- All
vn.*card types cannot be used with other card types that don't start withvn..
| Card type | Description |
|---|---|
vn.national_id | CMND, CCCD, VN Passport |
vn.cmnd_old | CMND old version |
vn.cmnd_new | CMND |
vn.cccd | CCCD |
vn.cccd_new | CCCD with chip |
vn.tcc | TCC |
vn.passport | VN Passport |
ph.national_id | PH National ID card |
global.passport | Global passport |
type CardType = {
  back_qr: {
    exist: boolean; // whether back side has QR code
  };
  code: string; // card type code
  front_qr: {
    exist: boolean; // whether front side has QR code
  };
  has_back_side: boolean; // whether card has back side
  front_face: {
    exist: boolean; // whether front side has face photo
  };
  back_face: {
    exist: boolean; // whether back side has face photo
  };
  name: string; // card type name
  orientation: "horizontal" | "vertical"; // card orientation
};
readIDCardWithApiCall
This api works the same as UI only version with the addition of calling api by SDK.
Params
The same as these params with an addition of the followings:
| Required | Type | Description | |
|---|---|---|---|
| apiCredentials | yes | ApiCredentials | Keys to make api call |
| serviceSettings | no | ServiceSettings | Settings to enable or disable API service calls from SDK. |
| flowId | no | FlowId | Flow ID to get corresponding client settings |
Read ID Card SDK result
onStepDoneResult has this shape (some fields may be missing depending on the settings and the specific step):
type ReadIDCardResult = {
  stepNumber: number; // the current step number
  cardSide: "front" | "back"; // card side of current step
  cardType: string; // card type of current step
  image: {
    blob: Blob; // the captured image of ID card
    encrypted?: {
      hex: string; // will be returned if outputEncryptionSettings.key is provided
    };
  };
  error?: any; // error of the captured image (if any). usually it is `id_detector_error_blur`, please check `Possible Error Objects` below.
  qrScannedResult?: {
    result: string; // the detected QR code
    validateResult: {
      valid: boolean; // whether the detected QR code follows new Vietnamese ID pattern
    };
    image: {
      blob: Blob; // QR image
      encrypted?: {
        hex: string; // will be returned if outputEncryptionSettings.key is provided
      };
    };
    recordedVideos?: [
      // recorded videos of QR capture process
      {
        id: string; // ignore
        frames: []; // array of frames in base64 format
      }
    ];
  };
  recordedVideos?: [
    // recorded videos of the whole process
    {
      id: string; // ignore
      frames: []; // array of frames in base64 format
    }
  ];
  fullVideo?: any;
  capturingVideo?: any;
  apiResult?: {
    sanityResult: any;
    tamperingInfo: any;
    cardInfo: any;
    cardImageId: string;
    qrImageId: string;
    mp4VideoIds: {
      full: string;
      capturing: string;
    };
  }; // will be returned only if the SDK is called APIs by itself
};
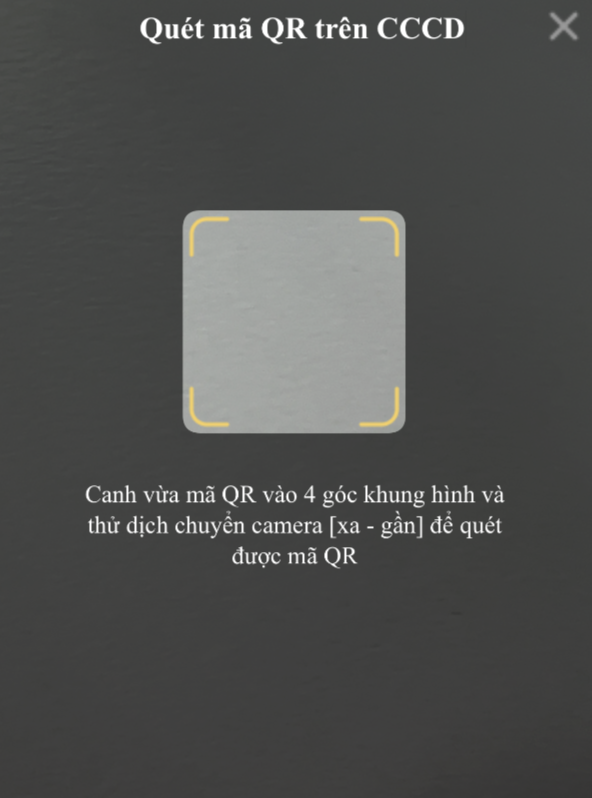
Scan QR code
To start the QR scanning step, we can use the readIDCardUIOnly or readIDCardWithApiCall method same as above, but with the steps property as below:
const qrScanStep = {
  scannerType: 'qr_code', // This is the scanner type to scan QR code
  title: 'Quét mã QR trên CCCD',
  titleIcon: ''
  enableConfirmPopup: false,
};

const idCardProps = {
  ...
  steps: [qrScanStep],
};
tv.readIDCardUIOnly(idCardProps);
Integration with Read ID Card
- The callback
onStepDonewill be invoked whenever a card image is captured. You can check the response data structure here
Upload ID Card Image
- Upload Image API: /v1/images
- You will receive the uploaded image ID when completed
const onStepDone = async ({ cardSide, cardType, image }) => {
  const uploadIDResponse = await API.uploadImage({
    file: image.blob,
    label: `id_card.${cardType}.${cardSide}`,
  });

  // If this front side, you must store the imageId so when capturing back side, you can pass it to verify tampering API
  const imageId = uploadIDResponse.file_id; // Sample response structure
};
Upload QR Image
- Upload Image API: /v1/images
- If the QR code is scanned successfully on the ID Card, the QR image will be returned by the SDK in
qrScannedResult
const onStepDone = async ({ qrScannedResult }) => {
  const uploadQRResponse = await API.uploadImage({
    file: qrScannedResult.image.blob,
    label: "qr_code",

    // Optional metadata field, you can add any custom info here
    metadata: JSON.stringify({
      raw: qrScannedResult.result,
    }),
  });

  // You need to store the QR imageId for detect tampering API
  const qrImageId = uploadQRResponse.file_id; // Sample response structure
};
Check Sanity of the image
- Check ID Sanity API: /v1/verify_id_card_sanity_sync
- Call this API on every card side check
const onStepDone = async ({ cardType, image }) => {
  // ... upload ID card image first to get imageId
  const sanityCheckResult = await API.verifyIDCardSanity({
    card_type: cardType,
    image1: { id: imageId },
  });
};
Check ID Tampering
- Detect ID Tampering API: /v1/detect_id_card_tampering_sync
- The
image2parameter is only required when capturing back side of the ID Card
const onStepDone = async ({ cardType, cardSide }) => {
  // ... upload front/back ID card images and QR image first to get their IDs

  const detectIDTamperingResult = await API.detectIDTampering({
    card_type: cardType,
    image: { id: frontCardId }, // this must be front side
    qr1_images: qrImageId ? [{ id: qrImageId }] : undefined,

    // Only add image2 when capturing back side
    image2: cardSide === "back" ? { id: backCardId } : undefined,
  });
};
Read ID Card Info
- Read ID Card Info API: /v1/read_id_card_info_sync
const onStepDone = async ({ cardType }) => {
  // ... upload front/back ID card images and QR image first to get their IDs

  const readIDCardResult = await API.readIDCardInfo({
    card_type: cardType,
    image1: cardSide === "back" ? { id: backCardId } : { id: frontCardId },
    qr1_images: qrImageId ? [{ id: qrImageId }] : undefined,
  });
};
Full sample code for Read ID Card flow
- The sample code below demonstrates the full flow of Read ID Card with all API calls integrated.
let frontImageId = null;
let backImageId = null;
let qrImageId = null;

const onStepDone = async ({ cardType, cardSide, image, qrScannedResult }) => {
  // Upload ID Card image
  const uploadIdCardResponse = await API.uploadImage({
    file: image.blob,
    label: `id_card.${cardType}.${cardSide}`,
  });
  const imageId = uploadIdCardResponse.file_id; // Sample response structure

  // Upload QR image if available
  if (qrScannedResult && qrScannedResult.image && qrScannedResult.result) {
    const uploadQRResponse = await API.uploadImage({
      file: qrScannedResult.image.blob,
      label: "qr_code",

      // Optional metadata field, you can add any custom info here
      metadata: JSON.stringify({
        raw: qrScannedResult.result,
      }),
    });
    qrImageId = uploadQRResponse.file_id; // Sample response structure
  }

  // Store front/back image IDs
  if (cardSide === "front") {
    frontImageId = imageId;
  } else {
    backImageId = imageId;
  }

  // Check ID Sanity
  const sanityCheckResult = await API.verifyIDCardSanity({
    card_type: cardType,
    image1: { id: imageId },
  });
  if (sanityCheckResult.errors) {
    // Handle sanity error
  }

  // Detect ID Tampering
  const detectIDTamperingResult = await API.detectIDTampering({
    card_type: cardType,
    image: { id: frontImageId }, // this must be front side
    image2: cardSide === "back" ? { id: backImageId } : undefined,
    qr1_images: qrImageId ? [{ id: qrImageId }] : undefined,
  });
  if (detectIDTamperingResult.errors) {
    // Handle detect tampering error
  }

  // Read ID Card Info
  const readIDCardResult = await API.readIDCardInfo({
    card_type: cardType,
    image1: cardSide === "back" ? { id: backImageId } : { id: frontImageId },
    qr1_images: qrImageId ? [{ id: qrImageId }] : undefined,
  });
  if (readIDCardResult.errors) {
    // Handle read ID card error
  }
};

tv.readIDCardUIOnly({
  // ...
  onStepDone: onStepDone,
  // ...
});
Front/Back step separation
- There are mainly 2 types of flow for reading ID Card
- Full front/back scanning within 1 SDK session
- Front/back scanning is splitted into separated sessions
- Full front/back scanning within 1 SDK session is demonstrated in the sample code above.
- In order to separate front/back/qr scanning into different sessions, you can use
stepsparameter to configure the scanning flow - You can check the
IDCardSteptype here
const frontStep = {
  scannerType: "id_card",
  cardSide: "front",
};
const backStep = {
  scannerType: "id_card",
  cardSide: "back",
};
const qrStep = {
  scannerType: "qr_code",
};

tv.readIDCardUIOnly({
  // ...
  steps: [frontStep, qrStep, backStep], // configure the steps as needed
  onStepDone: onStepDone,
  // ...
});
Liveness Detection
livenessDetection
This function starts liveness detection flow.
Params
A single object with these properties
| Required | Description | Type | Default | |
|---|---|---|---|---|
| mode | yes | Mode to operate | LivenessMode | |
| onLivenessDetectionDone | yes | Callback when liveness detection flow is done. | function(livenessResults:LivenessResults) | |
| onError | yes | Callback when errors happen. | function(error: Error) | |
| clientSettings | yes | Available from v5.3.1. This settings come from TS server and depend on your accessKey and secretKey.When apiCheck enable, this setting will be automated get from TS server and bind to SDK. Anything pass to this props will overwrite settings come with apiCheck.When you call api by your self, use this api to get client settings, and pass response to this props. | object | |
| apiCheck | no | If true, sdk will call APIs itself (apiCredentials is needed). | boolean | false |
| apiCredentials | no | Available from v5.3.1. Keys to make api calls | ApiCredentials | { accessKey: "", secretKey: "", apiUrl: ""} |
| customErrors | no | Available from v3.10.1. Custom the errors show on SDK. See example below. | object | null |
| onProcessing | no | Available from v4.3.0. From v4.3.0, SDK will resize output images to 400x400 before return. So this is the callback when SDK start resize images. Use to close camera or show loading. The resize process complete on onLivenessDetectionDone.If apiCheck is enable, this callback also includes api call time. | function | Empty function |
| onReset | no | Available from v5.16.6. Callback when liveness flow is reset. For example, when timeout happens, this callback will be triggered. See more here | function | Empty function |
| onFramesCaptured | no | Available from v5.3.1. The callback when SDK return sequence by batch. | function | Empty function |
| outputEncryptionSettings | no | Available from v5.8.0. If key is provided, output files will be encrypted and returned via encrypted field. Please see here. | object | { key: '' } |
| cameraScale | no | Available from v5.9.0. Scale up camera image in appropriate distance. | number ([1.0..2.0]) | 1.0 |
| offsetFaceY | no | Available from v5.9.3. Support large screen device (like Kiosk) to adjust "face area circle" for suitable user's height. Default is 0, pass a negative number to move "circle" to top, a positive number to move "circle" to bottom. | number (in pixel) | 0 |
| logCredentials | no | Config for tracking user's behavior while using | object | {} |
| title | no | Only available for some custom build. Title of EKYC screen. | string | "" |
| frontalMinSize | no | Available from v5.13.9. Scale last frontal image to frontalMinSize * frontalMinSize . The recommended value is 720. The scaled image will be returned in the frontalScaledImage field in LivenessResults` | number | null |
| customTexts | no | Only available from SDK version 5.21.0. Please refer to this section | object | {} |
| onClose | no | Callback when users click the X button | function | Empty function |
| serviceSettings | no | Settings to enable or disable API service calls from SDK. | ServiceSettings | - |
| flipVideoHorizontal | no | Flip video horizontally. Available since version 5.19.0 | boolean | null |
| flowId | no | Flow ID to get corresponding client settings | FlowId | "" |
Liveness Results
type LivenessDetectionResult = {
  steps: Array<{
    name: string;
    image: {
      blob: Blob;
      encrypted?: {
        hex: string; // will be returned if outputEncryptionSettings.key is provided
      };
      id?: string; // upload image id
    };
  }>;
  // UI Only Mode: frontalFaces contains blobs of captured frontal face images
  // API Mode: frontalFaces contains objects with blob and id (id is returned from upload API)
  frontalFaces: Array<
    | Blob
    | {
        blob: Blob;
        id: string; // upload image id
      }
  >;
  frontalFacesEncrypted?: Array<{
    hex: string; // will be returned if outputEncryptionSettings.key is provided
  }>;
  frontalScaledImage?: Blob;
  capturedFrames: Array<{
    label: string;
    base64: string;
    metadata: string;
    index: number;
  }>;
  video?: Blob;
  apiCheckPassed?: boolean;
  verifyFaceLivenessResult?: any;
  verifyFacePortraitResult?: any;
  uploadFramesResult: Array<{ id: string }>;
};
Custom Errors
tv.livenessDetection({
  ...otherProps
  customErrors={{
    face_too_small: {
      code: 'face_too_small',
      msg: {
        en: 'Face too small',
        vi: 'Đưa camera lại gần',
      },
    },
    face_too_large: {
      code: 'face_too_large',
      msg: {
        en: 'Face too large',
        vi: 'Đưa camera ra xa',
      },
    },
  }}
})
List errors can custom:
no_face: {
  code: 'no_face',
  msg: {
    en: 'Face not found',
    vi: 'Không tìm thấy khuôn mặt',
  },
},
partial_face: {
  code: 'partial_face',
  msg: {
    en: 'Face out of the box',
    vi: 'Không tìm thấy toàn bộ khuôn mặt',
  },
},
multiple_faces: {
  code: 'multiple_faces',
  msg: {
    en: 'Too many faces',
    vi: 'Quá nhiều khuôn mặt',
  },
},
face_too_small: {
  code: 'face_too_small',
  msg: {
    en: 'Face too small',
    vi: 'Khuôn mặt quá nhỏ',
  },
},
face_too_large: {
  code: 'face_too_large',
  msg: {
    en: 'Face too large',
    vi: 'Khuôn mặt quá to',
  },
},
face_out_of_box: {
  code: 'face_out_of_box',
  msg: {
    en: 'Face is out of box',
    vi: 'Khuôn mặt không nằm trọn vẹn trong khung ảnh',
  },
},
Integration with Liveness Detection
Note: If frame capturing functionality is enabled, please refer to this section
- See
LivenessDetectionDoneResultshape here
Upload selfie images
- You will need to upload selfie images returned by the SDK. Upload image API /v1/images
const onLivenessDetectionDone = ({ frontalFaces, steps }) => {
  const uploadFrontalImagePromises = frontalFaces.map((image: Blob) => {
    return API.uploadImage({
      file: image,
      label: "portrait",
      // Optional metadata field, you can add any custom info here
      metadata: JSON.stringify({
        label: "frontal",
      }),
    });
  });

  const uploadGestureImagePromises = steps.map((step) => {
    const blob = step.image.blob;
    return API.uploadImage({
      file: blob,
      label: "portrait",
      // Optional metadata field, you can add any custom info here
      metadata: JSON.stringify({
        label: step.name, // up, left, right gesture name
      }),
    });
  });

  const uploadFrontalImagesResult = await Promise.all(
    uploadFrontalImagePromises
  );
  const uploadGestureImagesResult = await Promise.all(
    uploadGestureImagePromises
  );
};
Call Verify Portrait Sanity API
- Verify portrait sanity API /v1/verify_portrait_sanity_sync
- Explanation of API parameters:
image: the LAST frontal face image ID infrontalFacesarray returned by SDK.
API.verifyPortraitSanity({
  image: {
    id: <String>, // Image ID of last frontal image in 'frontalFaces' have been uploaded
  },
});
Call Verify Face Liveness API
- Verify face liveness API /v1/verify_face_liveness_sync
- Explanation of API parameters:
images: list of uploaded frontal face image IDs. The order MUST be the same as thefrontalFacesarray returned by SDK.gesture_images: list of uploaded gesture image IDs with its step name.videos: list of uploaded video file IDs if frame capturing functionality is enabled. Please refer to this section
API.verifyFaceLiveness({
  images: Array<{
    id: <String>, // Image ID returned by Upload API
  }>,
  gesture_images: Array<{
    gesture: <String>, // Step name
    images: [{ id: <String> }], // Image ID returned by Upload API
  }>,
  videos: [{ frames: capturedFrames }], // add this parameter if frame capturing functionality is enabled
});
Liveness Detection Full sample code
const onLivenessDetectionDone = ({ frontalFaces, steps, capturedFrames }) => {
  const uploadFrontalImagePromises = frontalFaces.map((image: Blob) => {
    return API.uploadImage({
      file: image,
      label: "portrait",
      // Optional metadata field, you can add any custom info here
      metadata: JSON.stringify({
        label: "frontal",
      }),
    });
  });

  const uploadGestureImagePromises = steps.map((step) => {
    const blob = step.image.blob;
    return API.uploadImage({
      file: blob,
      label: "portrait",
      // Optional metadata field, you can add any custom info here
      metadata: JSON.stringify({
        label: step.name, // up, left, right gesture name
      }),
    });
  });

  const uploadFrontalImagesResult = await Promise.all(
    uploadFrontalImagePromises
  );
  const uploadGestureImagesResult = await Promise.all(
    uploadGestureImagePromises
  );

  const frontalImageIds = uploadFrontalImagesResult.map((res) => ({
    id: res?.data?.image_id, // Sample response structure
  }));

  const gestureImageIds = uploadGestureImagesResult.map((res, index) => ({
    gesture: steps[index].name,
    images: [{ id: res?.data?.image_id }], // Sample response structure
  }));

  const verifyPortraitSanityResponse = await API.verifyPortraitSanity({
    image: {
      id: frontalImageIds[frontalImageIds.length - 1].id,
    },
  });

  const verifyLivenessResponse = await API.verifyFaceLiveness({
    images: frontalImageIds,
    gesture_images: gestureImageIds,

    // Add this parameter if frame capturing functionality is enabled
    // Please see more at "Selfie Frames Capturing" section
    videos: [{ frames: capturedFrames }],
  });
};

tv.livenessDetection({
  // ...
  onLivenessDetectionDone: onLivenessDetectionDone,
  // ...
});
Face Authentication
faceAuthentication
Available from version 5.18.0.
This function starts face authentication flow.
Params
A single object with these properties
| Required | Description | Type | Default | |
|---|---|---|---|---|
| mode | yes | Mode to operate | string (one of [TVWebSDK.Constants.FaceAuthenticationMode.REGISTRATION, TVWebSDK.Constants.FaceAuthenticationMode.AUTHENTICATION]) | |
| authMethod | yes | Authentication method to operate | string (one of [TVWebSDK.Constants.FaceAuthMethod.STANDARD_AUTHEN, TVWebSDK.Constants.FaceAuthMethod.ADVANCED_AUTHEN_ACTIVE, TVWebSDK.Constants.FaceAuthMethod.EDGE_AUTHEN, TVWebSDK.Constants.FaceAuthMethod.ADVANCED_AUTHEN_FLASH, TVWebSDK.Constants.FaceAuthMethod.LIGHT_AUTHEN]) | |
| onDone | yes | Callback when face authentication flow is done. | function(faceAuthenticationResult:FaceAuthenticationResult) | |
| onError | yes | Callback when errors happen. | function(error: Error) | |
| clientSettings | yes | This settings come from TS server and depend on your accessKey and secretKey.When apiCheck enable, this setting will be automated get from TS server and bind to SDK. Anything pass to this props will overwrite settings come with apiCheck.When you call api by your self, use this api to get client settings, and pass response to this props. | object | |
| apiCheck | no | If true, sdk will call APIs itself (apiCredentials is needed). | boolean | false |
| apiCredentials | no | Keys to make api calls | ApiCredentials | { accessKey: "", secretKey: "", apiUrl: ""} |
| onClose | no | Callback when users click the X button | function | Empty function |
| authType | no | Authentication type, please see here | string | transfer |
| onFramesCaptured | no | The callback when SDK return sequence by batch. | function | Empty function |
| onReset | no | Callback when selfie flow is reset. For example, when timeout happens, this callback will be triggered. See more here | function | Empty function |
| outputEncryptionSettings | no | If key is provided, output files will be encrypted and returned via encrypted field. Please see here. | object | { key: '' } |
| logCredentials | no | Config for tracking user's behavior while using | object | {} |
| flowId | no | Flow ID to get corresponding client settings | FlowId | "face_authen" |
| serviceSettings | no | Settings to enable or disable API service calls from SDK. | ServiceSettings | - |
Face Authentication Result
type FaceImage = {
    id?: string,
    base64?: string,
    blob: Blob,
    label: string,
    metadata?: string, // JSON String
    encrypted?: string, // Only availble when outputEncryptionSettings.key is provided
}

type VideoFrame = {
  index: number,
  base64: string,
  label: string,
  metadata?: string, // JSON String
}

type Video = {
  id?: string,
  metadata?: string, // JSON String
  frames: VideoFrame[]
}

type GestureFace = {
  gesture: 'up' | 'left' | 'right' | 'down',
  images: FaceImage[]
}

type FaceAuthenticationResult = {
  customerUserId: string,
  faces: FaceImage[],
  videos: Video[],
  gestureFaces: GestureFace[],
  selfieType: 'light' | 'passive' | 'active' | 'flash_edge' | 'flash_advanced',
  faceType: 'selfie' | 'id_card' | null, // only available on REGISTRATION mode
  apiResult: { // response from api
    data: {...}
  }
}
Integration with Face Authentication
Sample code
// Setup callback function to interact and receive results from Web SDK
// This function will be called when a user finishes face authentication flow
async function onFaceAuthenticationDone(result: FaceAuthenticationResult) {
  // Host site will use these parameters to call Face Authentication API
  const {
    customerUserId,
    faces,
    videos,
    gestureFaces,
    selfieType,
    faceType,
    apiResult,
  } = result;

  // Upload face images to server
  const uploadedFaceImages = (
    await Promise.all(
      faces.map((face) => {
        // Upload face image to server
      })
    )
  )
    .map
    // Map to correct API format
    ();

  // Upload gestureFaces to server
  const uploadedGestureImages = (
    await Promise.all(
      gestureFaces.map((gestureFace) => {
        // Upload gesture image to server
      })
    )
  )
    .map
    // Map to correct API format
    ();

  const apiPayload = {
    cus_user_id: customerUserId,
    faces: uploadedFaceImages,
    videos: videos,
    gesture_faces: uploadedGestureImages,
    selfie_type: selfieType,
    face_type: faceType, // Only use in REGISTRATION mode

    // Only use in AUTHENTICATION mode
    // Please refer https://ekyc.trustingsocial.com/api-reference/customer-api#sample-request-26:~:text=use%2Dcase%20differently.-,auth_type,-description
    auth_type: "",
  };

  // Call REGISTER or AUTHENTICATE API
  // API Reference
  // REGISTER: https://ekyc.trustingsocial.com/api-reference/customer-api#request-face-authentication-registration
  // AUTHENTICATE: https://ekyc.trustingsocial.com/api-reference/customer-api#request-face-authentication
  // Call API here...

  // For REGISTER only
  // If API call is successful, we will need to store the customerUserId for future use
  localStorage.setItem("tv:cus-user-id", customerUserId);
}

// Get SDK Client Settings from Server
// API Reference: https://ekyc.trustingsocial.com/api-reference/customer-api#get-client-settings
const clientSettings = {};

const mode = TVWebSDK.Constants.FaceAuthenticationMode.AUTHENTICATION;
const authMethod = TVWebSDK.Constants.FaceAuthMethod.EDGE_AUTHEN;

const faceAuthenProps = {
  mode: mode,
  authMethod: authMethod,
  onDone: onFaceAuthenticationDone,
  clientSettings: clientSettings,
  onError: (e) => {
    // Handle error and close SDK
    console.log(e);
    tv.closeSDK();
  },
  onClose: () => {
    document.body.style.height = "auto";
    tv.closeSDK();
  },
};

// Start Face authentication
tv.faceAuthentication(faceAuthenProps);
Log event config
Available from SDK version 5.13.8
Context:
We record logs for tracking user's behavior while using SDK. We will provide a log key beside api key but only used for sending log events. It is important to keep the log key secure, just like the API key. We have 2 ways to configure:
- Temporary credential
Your BE server will call this api to generate a temporary credential and return this temporary credential to client side, then pass this temporary credential to SDK.
logCredentials: {
  accessKey: 'YOUR ACCESS KEY',
  secretKey: 'YOUR SECRET KEY',
  apiUrl: 'LOG EVENT URL',
  userId: 'X-REQUEST-ID',
  fallbackUrls: ['FALLBACK URL 1', 'FALLBACK URL 2'] // optional
}
- Temporary signature
Your BE server will follow this guide to generate a temporary signature and return this temporary signature to client side, then pass this temporary signature to SDK.
logCredentials: {
  logSignature: {
    timestamp: '', // X-TV-Timestamp
    signature: '', // Authorization
    logUrl: '', // API url for logging event
  },
  userId: 'X-REQUEST-ID'
}
Note: Only generate 1 temporary credential/signature in 1 session for consistent logs.
Integration Use cases
Different use cases may require different integration approaches. Below are some common use cases and their recommended integration methods.
Selfie Frames Capturing
- If Frame capturing is enabled in Selfie flow (through
clientSettings), SDK will provideonFramesCapturedcallback to let client upload frames to server side through /v1/files API. - Terms:
- Frame: each frame captured from camera stream during the liveness detection flow.
- Batch of frames : SDK will capture frames in batch during the flow. Each batch contains multiple frames.
Sample code for onFramesCaptured:
type VideoFrame = {
  index: number;
  base64: string;
  label: string;
  metadata?: string; // JSON String
};

const uploadBatchPromises = [];
// Callback when a batch of frames is captured
const onFramesCaptured = (frames: VideoFrame[]) => {
  // Convert frames array to binary file (Blob)
  const binaryFile = new Blob([JSON.stringify(frames)]);

  // Don't use `await` here to avoid blocking SDK flow
  // The `/v1/files` API will return file_id for the uploaded frames batch that we will use later
  const uploadPromise = API.uploadFrames({
    file: binaryFile,
    metadata: JSON.stringify({ type: "selfie" }),
    label: "video",
  });
  uploadBatchPromises.push(uploadPromise);
};

tv.livenessDetection({
  // ...
  onFramesCaptured: onFramesCaptured,
  // ...
});
- Then the
videosparam in /v1/verify_face_liveness_sync API call won't need to add heavy frames. It just needs array of file ids. - Please note that you must
awaitfor the last batch of frames to be uploaded before proceeding to get result
const onLivenessDetectionDone = async () => {
  // Here we await for all batches of frames to be uploaded
  const batchFileIds = await Promise.all(uploadBatchPromises).map(
    (response) => ({
      id: response?.data?.file_id, // We will get file_id from API.uploadFrames API response
    })
  );

  const verifyResult = await API.verifyFaceLiveness({
    // ... other params
    videos: batchFileIds,
  });
};
Selfie flow reset
- When selfie flow is reset, either through timeout or user put their face out of detection zone, the frame capturing process should be reset too.
- You can do that by clearing the
uploadBatchPromisesarray inonResetcallback.
const onReset = () => {
  uploadBatchPromises.length = 0;
  // Or
  // uploadBatchPromises = [];
};

tv.livenessDetection({
  // ...
  onReset: onReset,
  // ...
});
Full sample code for frame capturing in selfie flow:
// Array holding all upload promises for each batch of frames
const uploadBatchPromises: Promise<any>[] = [];

// Callback when a batch of frames is captured
const onFramesCaptured = (frames: VideoFrame[]) => {
  // Convert frames array to binary file (Blob)
  const binaryFile = new Blob([JSON.stringify(frames)]);

  // Don't use `await` here to avoid blocking SDK flow
  // The `/v1/files` API will return file_id for the uploaded frames batch that we will use later
  const uploadPromise = API.uploadFrames({
    file: binaryFile,
    metadata: JSON.stringify({ type: "selfie" }),
    label: "video",
  });
  uploadBatchPromises.push(uploadPromise);
};

const onReset = () => {
  uploadBatchPromises.length = 0;
  // Or
  // uploadBatchPromises = [];
};

const onDone = async () => {
  // Here we await for all batches of frames to be uploaded
  const batchFileIds = await Promise.all(uploadBatchPromises).map(
    (response) => ({
      id: response?.data?.file_id, // We will get file_id from API.uploadFrames API response
    })
  );

  const verifyResult = await API.verifyFaceLiveness({
    // ... other params
    videos: batchFileIds,
  });
};

tv.livenessDetection({
  // ...
  onFramesCaptured: onFramesCaptured,
  onReset: onReset,
  onLivenessDetectionDone: onDone,
  // ...
});

// Or
// tv.faceAuthentication({
//   // ...
//   onFramesCaptured: onFramesCaptured,
//   onReset: onReset,
//   onDone: onDone,
//   // ...
// });
Images/Frames Encryption
- If client uses
outputEncryptionSettingsprop in Read ID Card, Liveness Detection and Face Authentication, SDK will encrypt images and frames with the given key, and return the encrypted data on SDK done. - You can generate the
keyin OutputEncryptionSettings usinguuidlibrary or any other method.
Images
- The encrypted image in return via the
encryptedfield, as described in the SDK Results sections for Read ID Card and Liveness Detection. - When client receives the encrypted image, they can upload image as described above, and they MUST add the
X-TV-Keyheader with the same value of SDK'soutputEncryptionSettings.keyto decrypt the image on the server side. - Instead of uploading the image Blob returned by SDK, client will need to upload the encrypted hex string.
const binaryFile = new Blob([hexString]);
API.uploadImage(
  {
    file: binaryFile,
    // ... other params
  },
  {
    headers: {
      "X-TV-Key": outputEncryptionSettings.key,
    },
  }
);
Frames
- Available from SDK version 5.18.0
- The data that need to be encrypted in each frame are
base64andmetadata(currently only Flash liveness frames havemetadatafield, Active and Passive liveness frames only havebase64). If encryption is enabled, the values ofbase64andmetadatawill be the encrypted data. - When client receives the encrypted frames, they can upload frames, and they MUST add the
X-TV-Keyheader with the same value of SDK'soutputEncryptionSettings.keyto decrypt the frames on the server side. - The parameters in
/v1/filesAPI remain the same, the only difference is the headerX-TV-Keythat need to be added.
const uploadPromise = API.uploadFrames(
  {
    // payload remains the same
  },
  {
    headers: {
      "X-TV-Key": outputEncryptionSettings.key, // Add this header
    },
  }
);
Hybrid mode with SDK
- You can configure SDK to partially handle some API services in the flow, and handle the remaining services by your own using
serviceSettingsparameter. - The
serviceSettingsparameter is available in both Read ID Card, Liveness Detection and Face Authentication methods. - You can check the type of
servicesSettingsparameter here:- Read ID Card With API Call: Only available with
.readIDCardWithApiCall()method - Liveness Detection: Only available when
apiCheckparameter is set totrue - Face Authentication: Only available when
apiCheckparameter is set totrue
- Read ID Card With API Call: Only available with
- The SDK will use the the following API endpoints to call with the base URL in
apiUrlin ApiCredentials:enableGetClientSettings: /v1/client_settingsenableUploadFrames: /v1/filesenableUploadImages: /v1/imagesenableVerifySanityPortrait: /v1/verify_portrait_sanity_syncenableVerifySanityIDCard: /v1/verify_id_card_sanity_syncenableVerifyFaceLiveness: /v1/verify_face_liveness_syncenableDetectIDCardTampering: /v1/detect_id_card_tampering_syncenableReadIDCardInfo: /v1/read_id_card_info_syncenableRegisterFace: /v1/face_auth_registerenableAuthenticateFace: /v1/face_auth
- Common use case is to enable image/frame upload service and then disable everything else
const serviceSettings = {
  enableUploadFrames: true,
  enableUploadImages: true,
  enableGetClientSettings: false,
  enableVerifySanityPortrait: false,
  enableVerifySanityIDCard: false,
  enableVerifyFaceLiveness: false,
  enableDetectIDCardTampering: false,
  enableReadIDCardInfo: false,
  enableRegisterFace: false,
  enableAuthenticateFace: false,
};
- With the above configuration, SDK will only upload images/frames to server side, and client will handle the remaining API calls by themselves using the returned file ids from SDK.
WebView implementer notes
To make Web SDK work on a WebView, the WebView implementer must supports getUserMedia API and handle camera permission requests correctly.
For Android WebView, the implementer also needs to set the setMediaPlaybackRequiresUserGesture config to
false. Otherwise, the camera video cannot be autoplay (the WebView requires a user gesture to play media).For iOS WebView, please set allowsInlineMediaPlayback to
trueto allow inline video playback.
Zalo Miniapp configuration
- When embedding eKYC SDK into Zalo Miniapp (ZMA), with the default configuration of ZMA, the UI of the SDK will occupy the whole screen of the device
- In order to fix it, you must enable ZMA Status bar and Action bar either using
configAppViewor inapp-config.json
configAppView
import { configAppView } from "zmp-sdk/apis";

configAppView({
  actionBar: {
    hide: false,
  },
  statusBarType: "normal",
});
app-config.json
{
  "app": {
    "statusBar": "normal",
    "actionBarHidden": false
  }
}
API Interface
LivenessMode
Type: string
| Value | Description | Version |
|---|---|---|
flash_32 | Flash 32 mode | 5.18.0 |
flash_16 | Flash 16 mode | 5.18.0 |
flash_8 | Flash 8 mode | 5.18.0 |
passive_v2 | Passive V2 mode | 5.24.0 |
flash | Flash mode | 5.14.0 |
flash_advanced | Flash advanced mode | 5.18.0 |
flash_edge | Flash edge mode | 5.18.0 |
active | Active mode | |
passive | Passive mode |
ServiceSettings
- Only available if API Mode is enabled.
.readIDCardWithApiCall.livenessDetectionwithapiCheck = true.faceAuthenticationwithapiCheck = true
- Type:
object
| Property | Description | Type | Default | Version |
|---|---|---|---|---|
enableGetClientSettings | Enable/Disable get client settings | boolean | true | 5.21.1 |
enableUploadFrames | Enable/Disable upload frames | boolean | true | 5.19.0 |
enableUploadImages | Enable/Disable upload images | boolean | true | 5.19.0 |
enableVerifySanityPortrait | Enable/Disable verify sanity for Portrait image service. Require enableUploadImages set to true | boolean | true | 5.19.0 |
enableVerifySanityIDCard | Enable/Disable verify sanity for ID Card image service. Require enableUploadImages set to true | boolean | true | 5.19.0 |
enableVerifyFaceLiveness | Enable/Disable verify face liveness service. Require enableUploadImages set to true | boolean | true | 5.19.0 |
enableDetectIDCardTampering | Enable/Disable detect ID Card tampering service. Require enableUploadImages set to true | boolean | true | 5.19.0 |
enableReadIDCardInfo | Enable/Disable read ID Card info service. Require enableUploadImages set to true | boolean | true | 5.19.0 |
enableRegisterFace | Enable/Disable register face service. Require enableUploadImages set to true | boolean | true | 5.19.0 |
enableAuthenticateFace | Enable/Disable authenticate face service. Require enableUploadImages set to true | boolean | true | 5.19.0 |
- Sample configuration:
const serviceSettings = {
  enableGetClientSettings: true,
  enableUploadFrames: true,
  enableUploadImages: true,
  enableVerifySanityPortrait: true,
  enableVerifySanityIDCard: true,
  enableVerifyFaceLiveness: true,
  enableDetectIDCardTampering: true,
  enableReadIDCardInfo: true,
  enableRegisterFace: true,
  enableAuthenticateFace: true,
};
ApiCredentials
Type: object
Keys to make API calls.
| Property | Description | Type | Default |
|---|---|---|---|
accessKey | Access Key | string | \"\" |
secretKey | Secret Key | string | \"\" |
apiUrl | API base URL | string | \"\" |
fallbackUrls | Fallback API base URLs, used when calls to apiUrl fail due to network errors, timeout | string[] | undefined |
FlowId
Type: string
| Value | Description | Version |
|---|---|---|
face_authen | Value for Face Authencation flow | 5.21.1 |
onboarding | Value for Onboarding flow | 5.21.1 |
IDCardStep
Type: object
| Value | Description | Type | Required |
|---|---|---|---|
scannerType | Scan mode | "id_card" | "qr_code" | yes |
cardSide | Card side to be scanned | "front" | "back" | no |
title | Step title | string | no |
description | Step description | string | no |
cardType | Card type to be scanned | string | no |
OutputEncryptionSettings
- See more at With encryption
Type: object
| Property | Description | Type | Default |
|---|---|---|---|
| key | Encryption key to encrypt output files (images/frames) | string | "" |
LanguageCode
Type: string
| Value | Description | Version |
|---|---|---|
vi | Vietnamese | |
en | English | |
es-mx | Mexican Spanish | 5.33.0 |
hi | Hindi | 5.35.0 |
Utils
initNativeCamera
To open native camera instead of custom camera
| Required | Type | Default | Description | |
|---|---|---|---|---|
| useFileBrowse | no | boolean | false | option to open file browse (gallery) or camera |
| accept | no | string | image/* | this param specifies a filter for what file types the user can pick from the file input dialog box |
| frontCamera | no | boolean | false | which camera to open |
| onCaptureDone | no | function | Empty function | Callback to return { file, encrypted: { hex } } where file is of type File and encrypted.hex (encrypted file encoded in hex string) will be returned if outputEncryptionSettings.key is provided |
| outputEncryptionSettings | no | object | { key: '' } | if key is provided, output files will be encrypted and returned as encrypted object as above |
Return value: { openCamera } where openCamera is the function you can use to trigger opening camera.
Example:
https://unpkg.com/@tsocial/tvweb-sdk@latest/examples/native-camera/index.html
function handleCaptureDone({ file }) {
  imgResultEl.src = URL.createObjectURL(file);
  imgResultEl.onload = function () {
    URL.revokeObjectURL(this.src);
  };
}
const { openCamera } = tv.initNativeCamera({
  frontCamera: false,
  onCaptureDone: handleCaptureDone,
});
buttonOpenCamera.onclick = openCamera;
Notes: Some browsers don't open native camera directly at first. They'll show a popup to choose File Browser or Open Camera... instead.
runPreloadEKYCResources
For the best user experience, this function should be called before calling readIDCardUIOnly, readIDCardWithApiCall, livenessDetection to preload heavy resources and cache them. we should call this method when the first page was loaded. it will load resources in the background and not impact to user experience.
Note: Supported since 5.7.4+
destroyView
Stop the camera immediately Sample code:
tv.destroyView();
closeSDK
Alias for destroyView
tv.closeSDK();
getListCamera (Working with multi-camera device)
Available from v5.9.0. Get list camera on deivce and choose the right camera. Get list camera:
tv.getListCamera().then((result) => {
  const cameras = result.filter(
    (device) => device.deviceId && device.kind === "videoinput"
  );
});
Output:
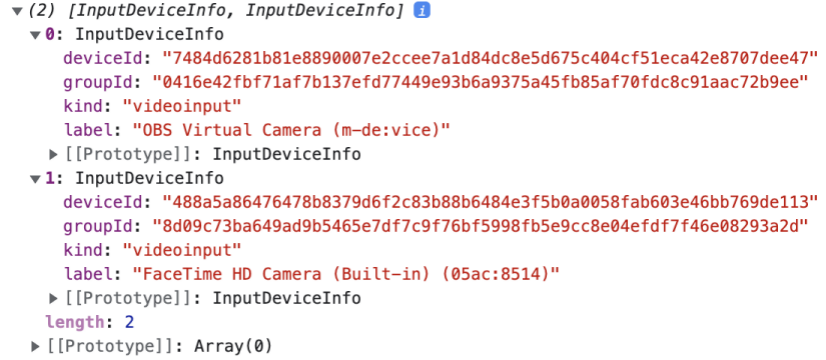
Use deviceId to open the desired camera
tv.readIDCardUIOnly({
...
// others props
defaultCameraId: deviceId
});
---
tv.livenessDetection({
...
// others props
defaultCameraId: deviceId
});
compareFaces
Compare face from readIDCard result & livenessDetection result.
Params: a single object with these properties
| Required | Description | Type | Default | |
|---|---|---|---|---|
| accessKey, secretKey, apiUrl | yes | Keys to make api calls | string | |
| image1 | yes | The id of the front card image returns from onSuccess in readIDCard method. | string | |
| image2 | yes | The id of the first image returns from onLivenessDetectionDone (verifyFaceLivenessResult) in livenessDetection method. | string | |
| onSuccess | yes | Success callback | function | |
| onError | yes | Error callback | function |
Sample code:
tv.compareFaces({
  accessKey: "YOUR ACCESS KEY",
  secretKey: "YOUR SECRET KEY",
  apiUrl: "https://tv-staging.trustingsocial.com/api",
  image1: "image_id from upload API",
  image2: "image_id from upload API",
  onSuccess: (rs) => console.log(rs),
  onError: (e) => console.log(e),
});
getDeviceInfo
Only available from SDK version 5.18.0
An async function to get device information.
const metadata = await tv.getDeviceInfo();
console.log(metadata);
Device information will be returned as an object with the following properties (will return null if SDK cannot get information of that property):
| Property | Value |
|---|---|
id | string or null |
udid | string or null |
sn | string or null |
imei | string or null |
manufacturer | string or null |
deviceName | string or null |
wlanMac | string or null |
phoneNumber | string or null |
location | { longitude: string or null, latitude: string or null } |
Localization
Only available from SDK version 5.21.0
Each country has its default locales as follows:
| Country | Locales available | Default |
|---|---|---|
| Vietnam (vn) | vi or en | vi |
| Philippines (ph) | en | en |
| India (in) | en | en |
| Mexico (mx) | es-mx | es-mx |
The default locale will be chosen based on the country and lang that are defined when you init the SDK.
If you wish to overwrite the default texts, you can pass the customTexts object prop to your flow. The available texts to overwrite are listed below.
Note: Some previously customized texts/errors in older versions will be kept for backward compatibility. Please contact us if you need to update them.
| Key | Default en locale | Default vi locale | Default es-mx locale | Note |
|---|---|---|---|---|
not_supported | Camera is not well-supported on this device/browser. Please try another one. | Camera không được hỗ trợ. Vui lòng thử trình duyệt hoặc thiết bị khác. | No se pudo abrir la cámara. Verifique la configuración de la cámara o inténtelo en otro navegador/dispositivo. | |
camera_timeout | Can't access camera. Please check camera permission, try again or try another browser/device | Không thể truy cập camera. Vui lòng kiểm tra quyền truy cập camera, đóng các tab/app khác đang sử dụng camera hoặc thử lại trên trình duyệt/thiết bị khác. | No se pudo abrir la cámara. Verifique la configuración de la cámara o inténtelo en otro navegador/dispositivo. | |
wrong_orientation | You are using landscape mode. Please rotate screen to portrait mode and retry. | Bạn đang sử dụng chế độ màn hình xoay ngang. Vui lòng quay màn hình theo chiều dọc và thực hiện lại. | Estás usando el modo horizontal. Gira la pantalla al modo vertical y vuelve a intentarlo. | |
unable_to_load_model | Unable to load model on this device/browser. Please try another one. | Không thể load model. Vui lòng thử trình duyệt hoặc thiết bị khác. | No se puede cargar el modelo en este dispositivo/navegador. Prueba con otro. | |
no_permission | Please grant the permission to access the camera. | Vui lòng cấp quyền để truy cập camera. | Conceda permiso a esta aplicación para acceder a la cámara. | |
no_face | Face not found | Không tìm thấy khuôn mặt | Por favor coloque su cara en el marco | |
partial_face | Face out of the box | Không tìm thấy toàn bộ khuôn mặt | Por favor, ajuste su cara completamente al marco | |
multiple_faces | Too many faces | Quá nhiều khuôn mặt | Mas de una cara detectada | |
face_too_small | Face too small | Khuôn mặt quá nhỏ | Por favor, acerque su rostro a la camara | |
face_too_large | Face too large | Khuôn mặt quá to | Por favor, aleje su rostro de la camara | |
face_out_of_box | Face is out of box | Khuôn mặt không nằm trọn vẹn trong khung ảnh | Por favor, ajuste su cara completamente al marco. | |
liveness_too_fast | Please turn your face SLOWLY | Vui lòng quay CHẬM lại | Por favor, gira la cabeza más lentamente | |
liveness_terminated | Please try again. | Vui lòng thực hiện lại. | Por favor, intente de nuevo | |
liveness_terminated_face_tracking | You need to turn your face SLOWLY. Please try again. | Bạn cần quay CHẬM lại. Vui lòng thực hiện lại. | Necesita girar su cara lentamente\nPor favor, intente de nuevo | |
liveness_terminated_no_face | Your face was missing for too long. Please try again. | Khuôn mặt không nằm trong khung hình. Xin vui lòng thử lại. | Su cara no aparecio por mucho tiempo\nPor favor, intente de nuevo | |
liveness_terminated_time_out | You need to complete gestures as instructed within <%= x %> seconds. Please try again. | Bạn cần hoàn thành động tác theo chỉ dẫn trong <%= x %> giây. Xin vui lòng thử lại. | Necesita completar el proceso entre <%= x %> segundos.\nPor favor, intente de nuevo | Must include <%= x %> as-is to show countdown |
id_detector_validate_angle_error | Please place ID card straight, not tilted | Vui lòng đặt giấy tờ thẳng, không bị nghiêng khi chụp | Sostenga la identificación plana y mirando hacia la cámara | |
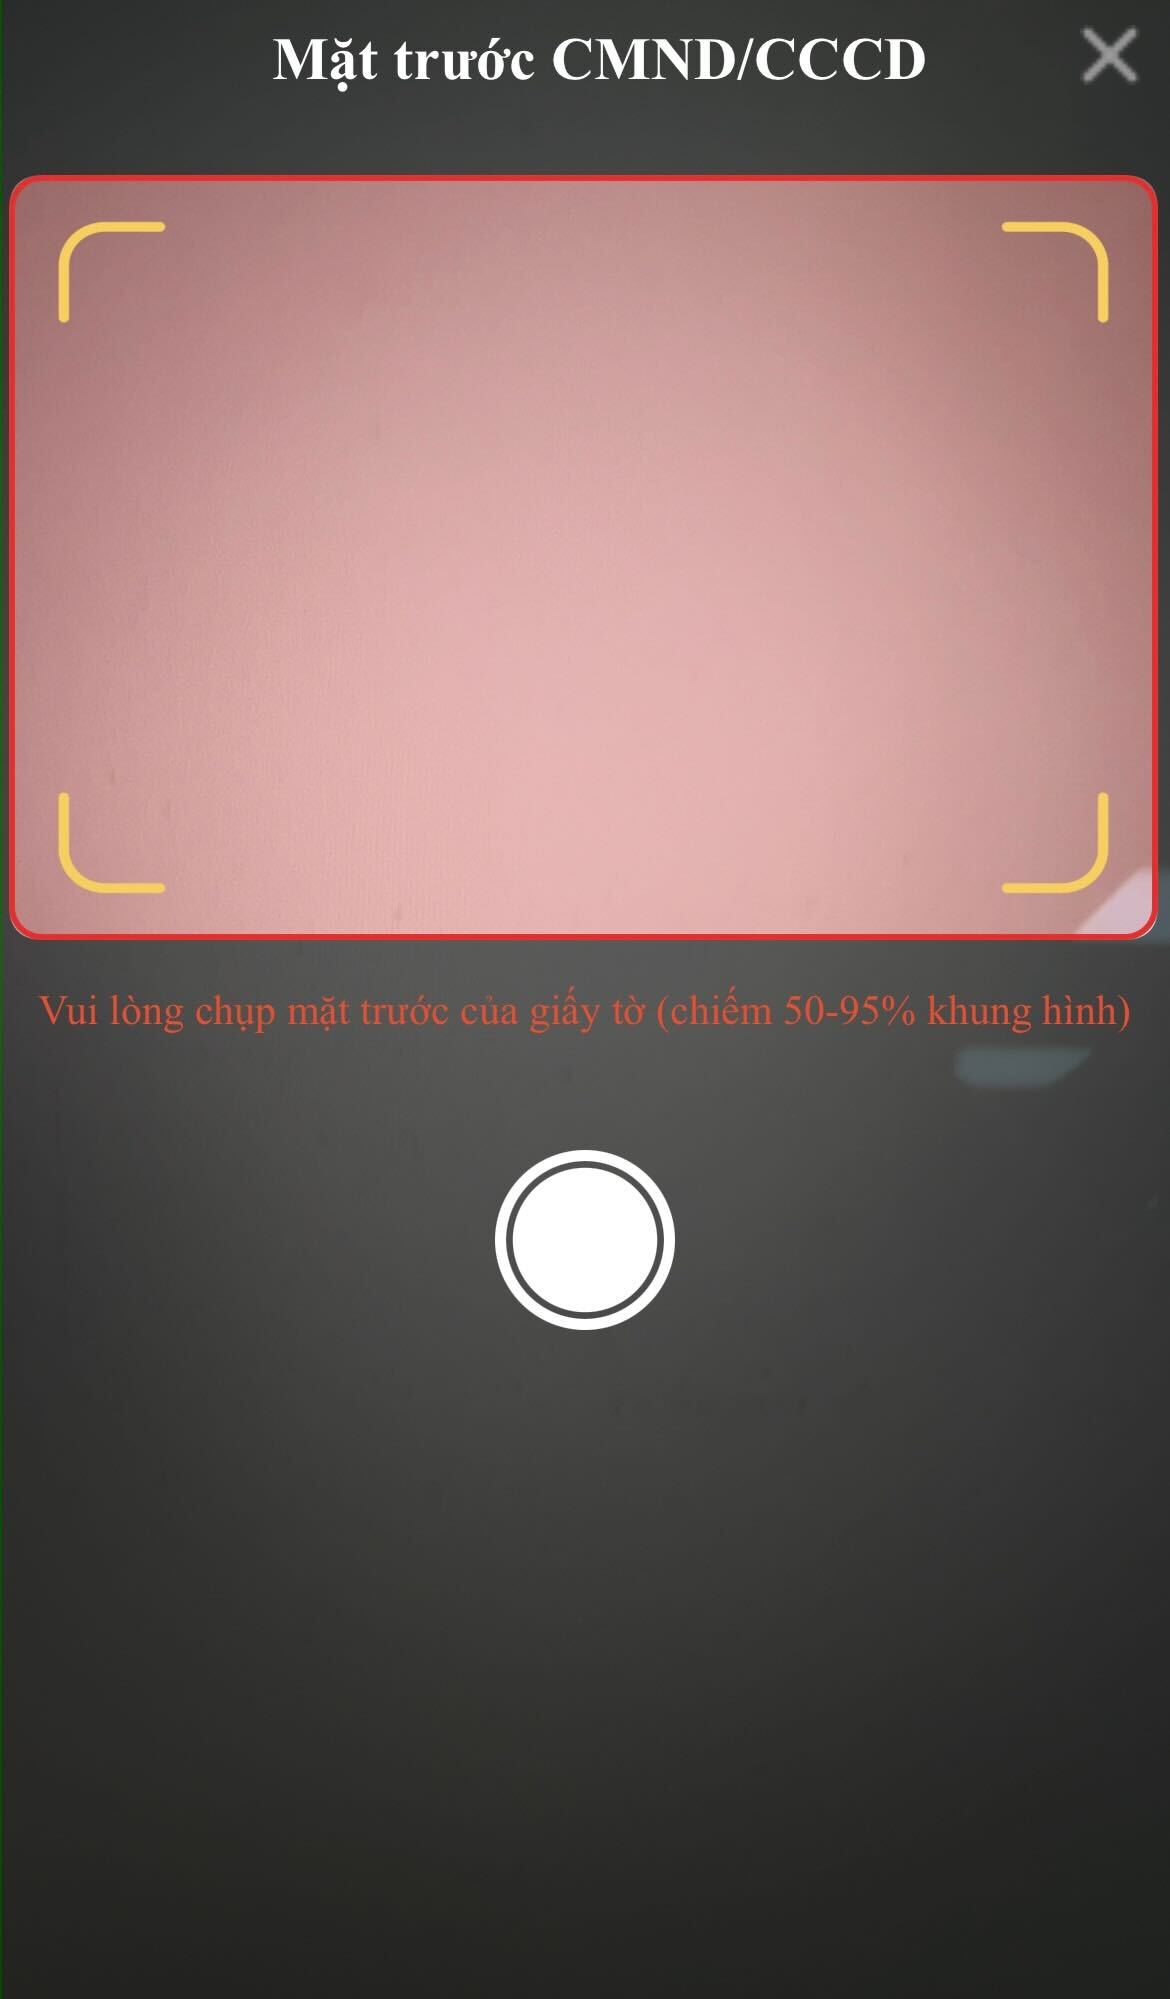
id_detector_no_cards | Please capture the <%= side %> side of ID card (occupy 50-95% of the frame) | Vui lòng chụp mặt <%= side %> của giấy tờ (chiếm 50-95% khung hình) | Mantenga el <%= side %> de su identificacion completamente dentro del marco. | Must include <%= side %> as-is to show card side |
id_detector_card_too_small | Please move ID card CLOSER (occupy 50-95% of the frame) | Vui lòng đưa giấy tờ lại GẦN hơn (chiếm 50-95% khung hình) | Por favor, acerque la identificación | |
id_detector_error_incomplete | Please move ID card FARTHER (occupy 50-95% of the frame) | Vui lòng đưa giấy tờ ra XA hơn (chiếm 50-95% khung hình) | Por favor, coloque la identificación completamente en el marco | |
glare_detected | Glare is detected. Please adjust the shooting angle | Ảnh bị chói / lóa. Vui lòng điều chỉnh góc chụp. | Se detectó deslumbramiento.\nIntente inclinar la tarjeta o cambiar el ángulo | |
id_detector_error_front_side_no_faces | Please capture the front side of ID card | Vui lòng chụp mặt trước của giấy tờ | Por favor, capture el frente de la identificación | |
id_detector_error_front_side_multiple_faces | Please capture the front side of one ID card only (remove other items out of the frame) | Vui lòng chụp mặt trước 1 giấy tờ duy nhất | Por favor, asegúrese de que solo haya una identificación dentro del marco | |
id_detector_error_back_side_has_faces | Please capture the back side of ID card | Vui lòng chụp mặt sau của giấy tờ | Por favor, capture el reverso de la identificación | |
id_detector_error_blur | Blurry photo detected. Please capture again for a clearer image | Ảnh bị mờ. Vui lòng chụp lại để có ảnh rõ nét hơn | Foto borrosa, capture de nuevo para una mejor imagen | |
not_frontal_face | Please look straight to camera. | Vui lòng nhìn thẳng vào camera. | Por favor, mira directamente a la cámara | |
not_readable | Camera already in use by another app/tab. | Camera đang được sử dụng bởi ứng dụng/tab khác. | Otra aplicación o pestaña del navegador ya está usando la cámara. Busque y cierre esa aplicación/pestaña. | |
close_eye | Open your eyes clearly | Vui lòng mở to mắt | Por favor, abre bien los ojos | |
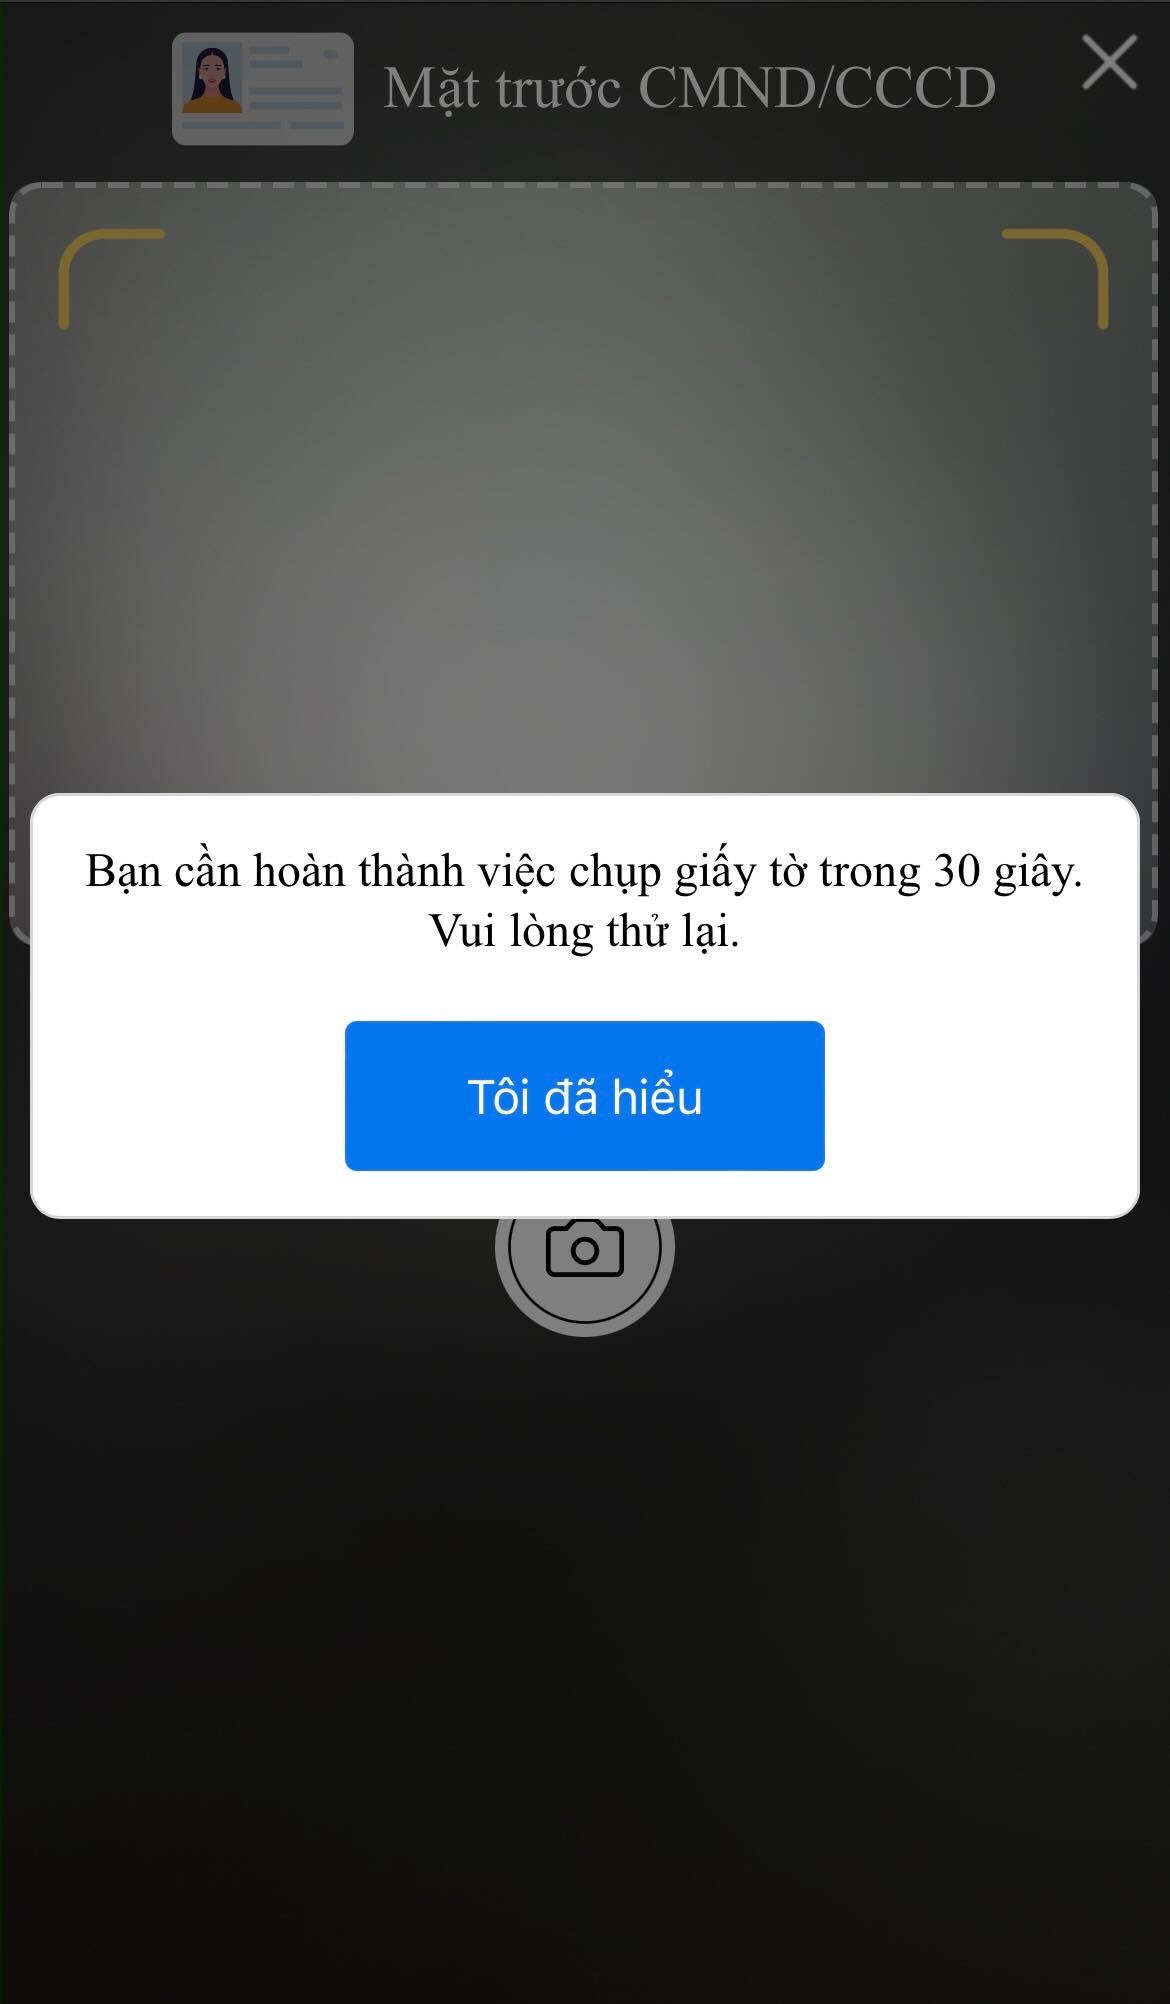
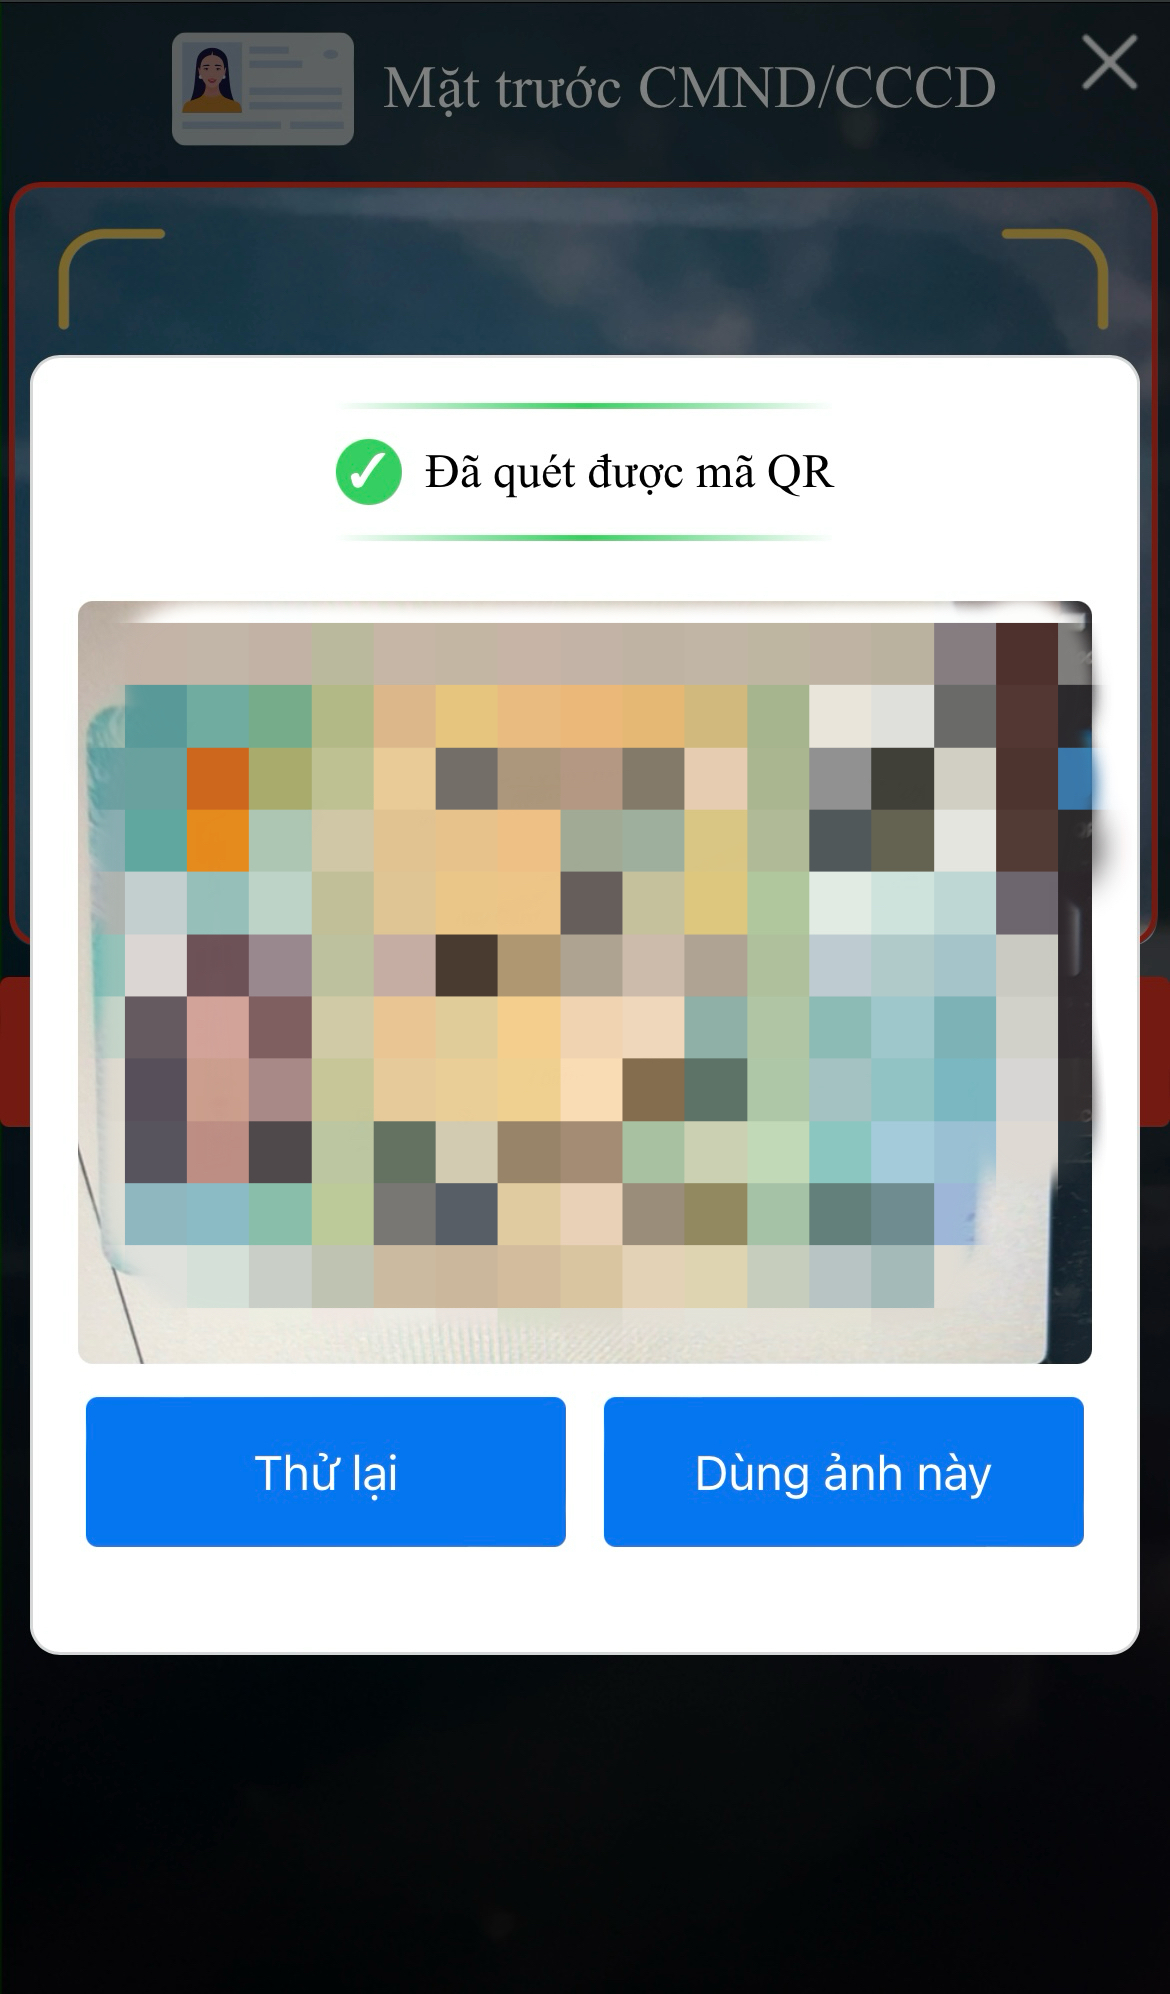
front_card_title | Front side of ID card | Mặt trước CMND/CCCD | Frente de la identificacion | |
back_card_title | Back side of ID card | Mặt sau CMND/CCCD | Reverso de la identificacion | |
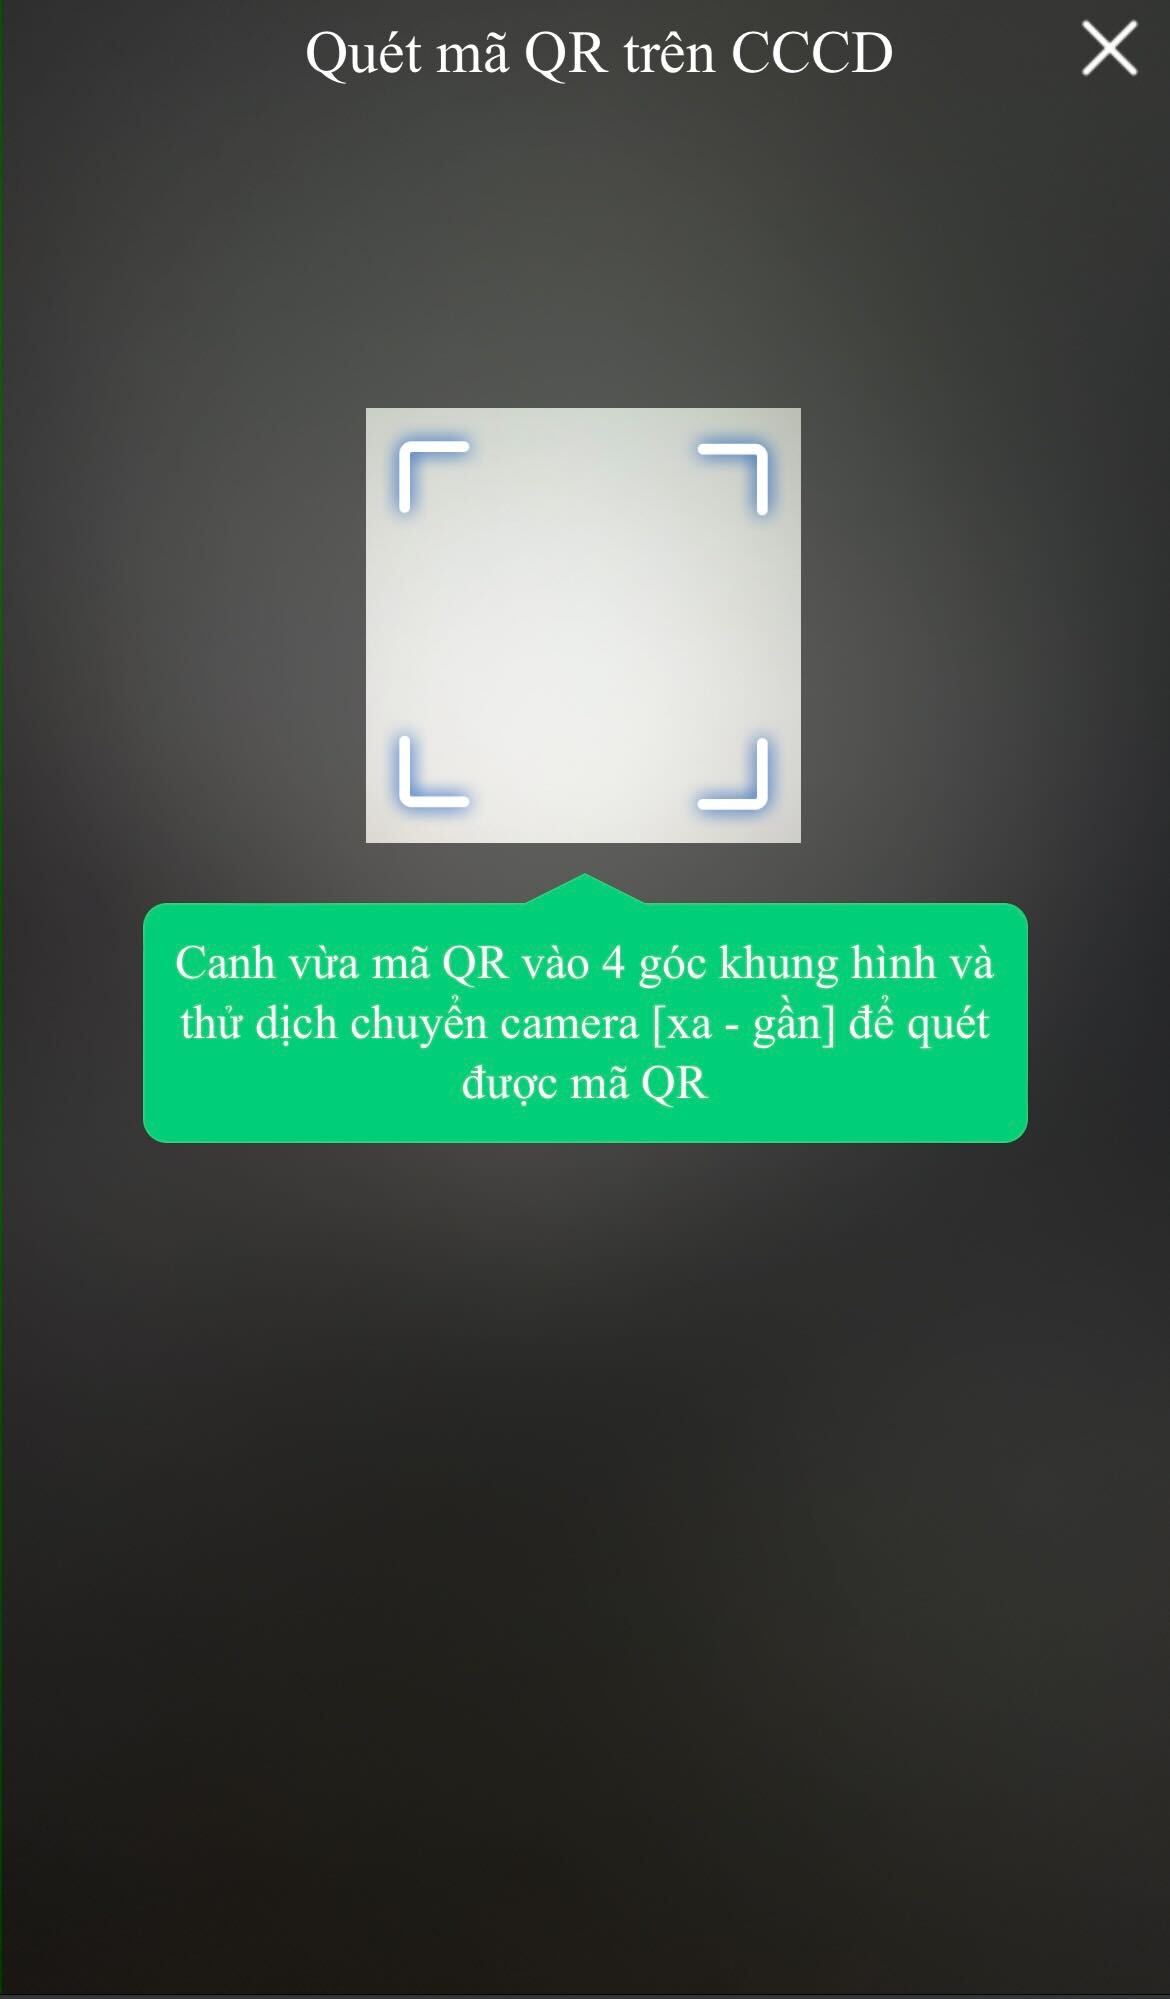
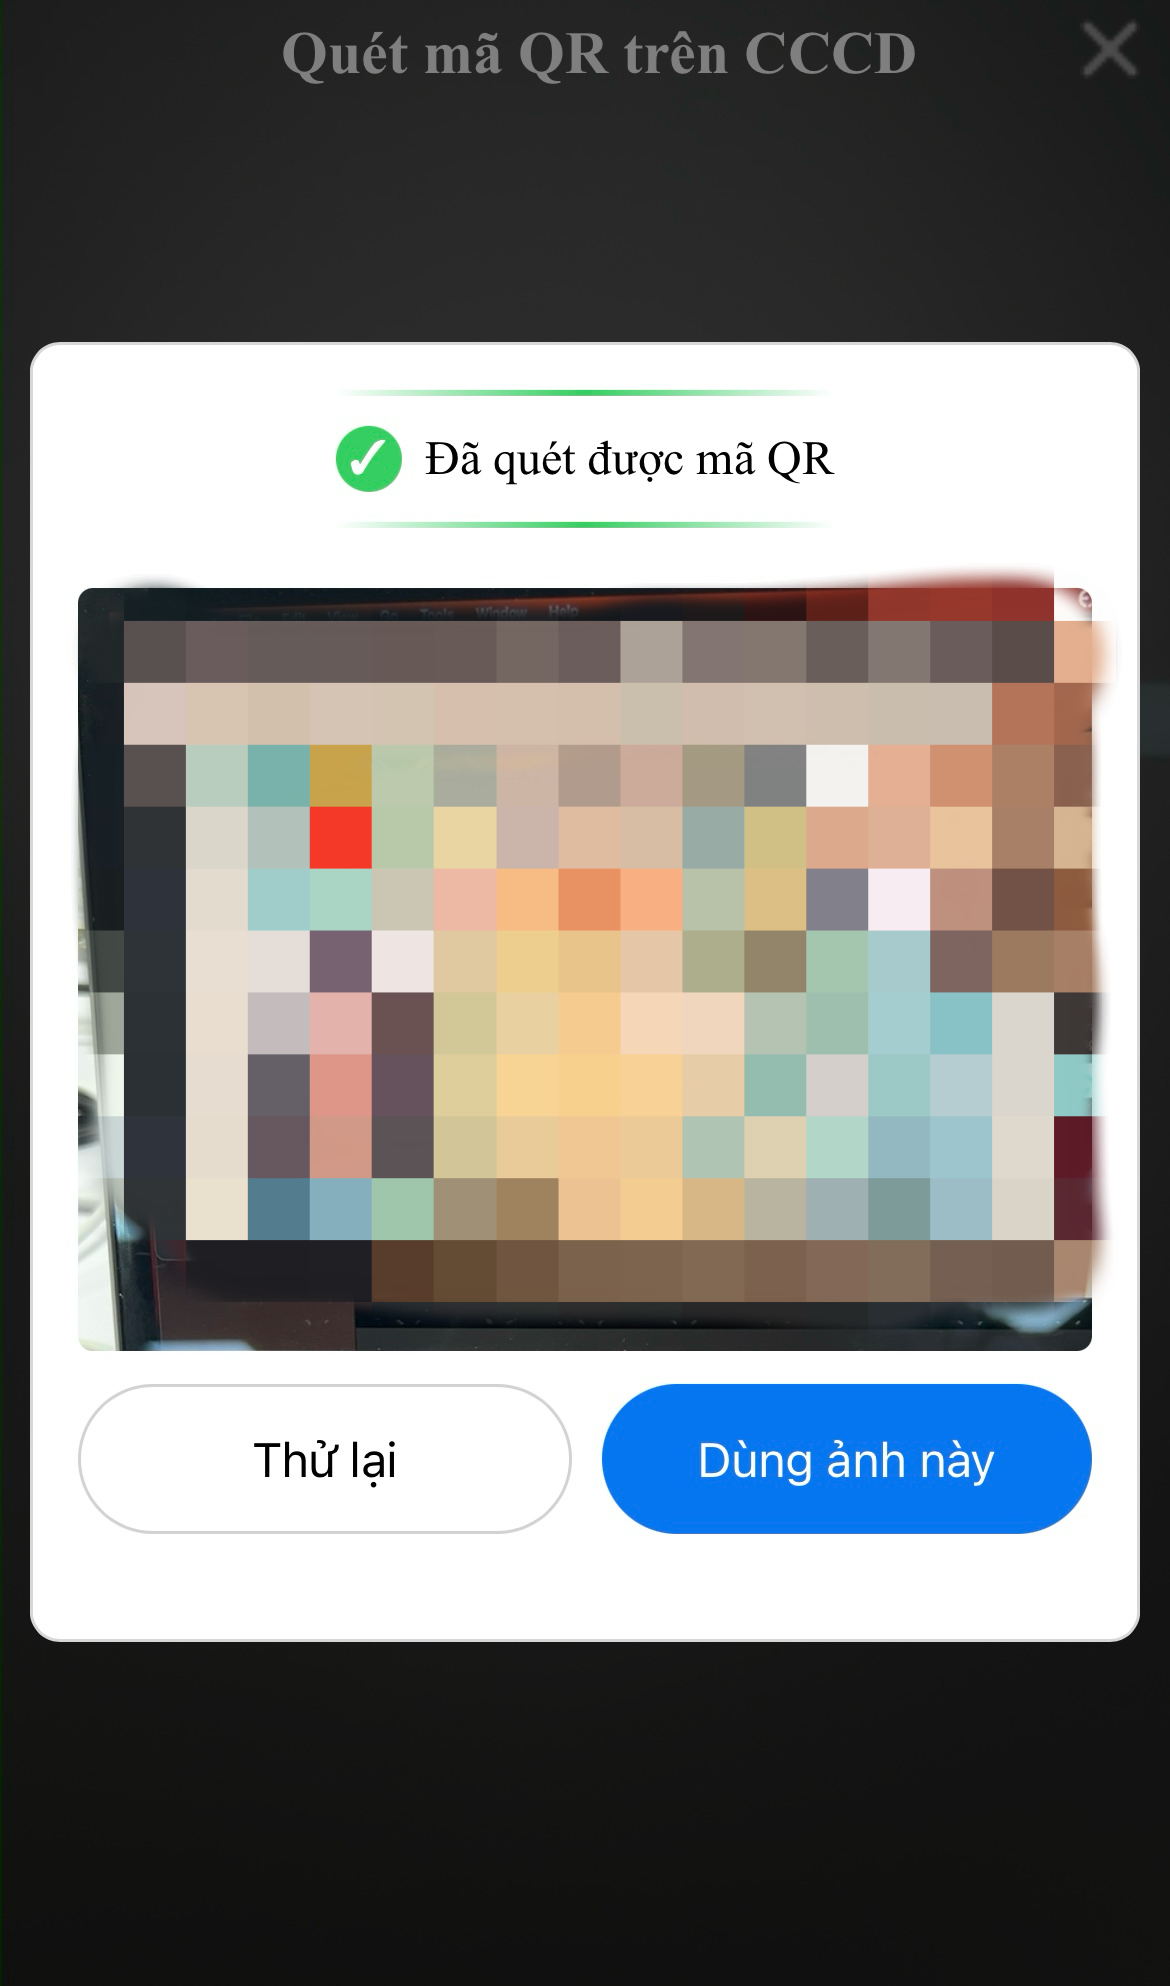
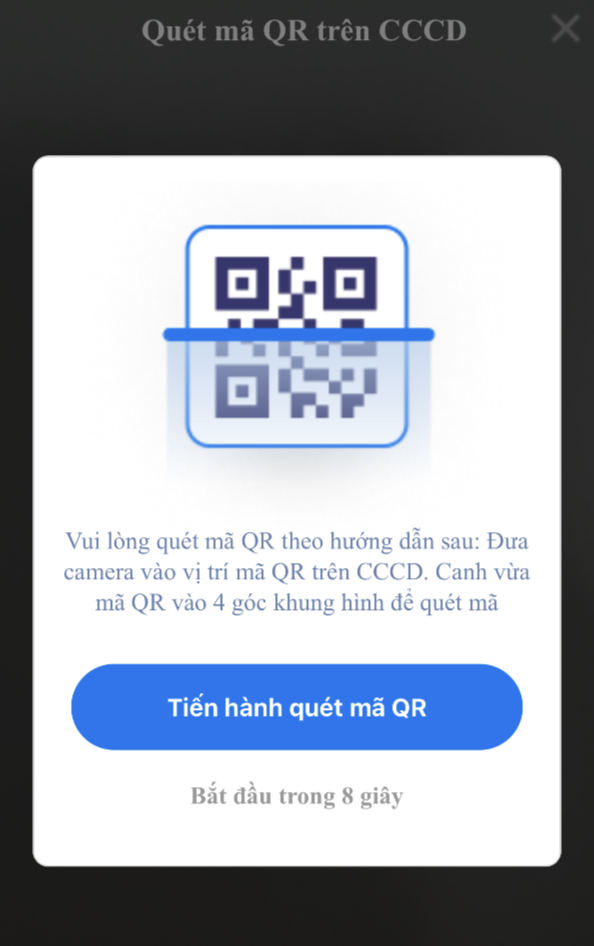
qr_title | Scan QR code on ID card | Quét mã QR trên CCCD | Escanear QR | |
front_card_description | Please put the front side of ID card into the frame | Vui lòng đặt CMND mặt trước vào trong khung | Coloca tu identifiacion dentro del recuadro | |
back_card_description | Please put the back side of ID card into the frame | Vui lòng đặt CMND mặt sau vào trong khung | Coloca tu identifiacion dentro del recuadro | |
btn_ok | OK | Tôi đã hiểu | OK | |
front | front | trước | frente | |
back | back | sau | reverso | |
btn_use_this_picture | Use this picture | Dùng ảnh này | Use esta imagen | |
btn_try_again | Try again | Thử lại | Intente de nuevo | |
confirm_popup_valid_qr | QR code scanned | Đã quét được mã QR | Codigo QR escaneado | |
confirm_popup_invalid_qr | Could not scan QR code | Không quét được mã QR | No es posible escanear codigo QR | |
remaining_time | Remaining time: <%= x %> seconds | Thời gian còn lại: <%= x %> giây | Restante: <%= x %> segundos | Must include <%= x %> as-is to show countdown |
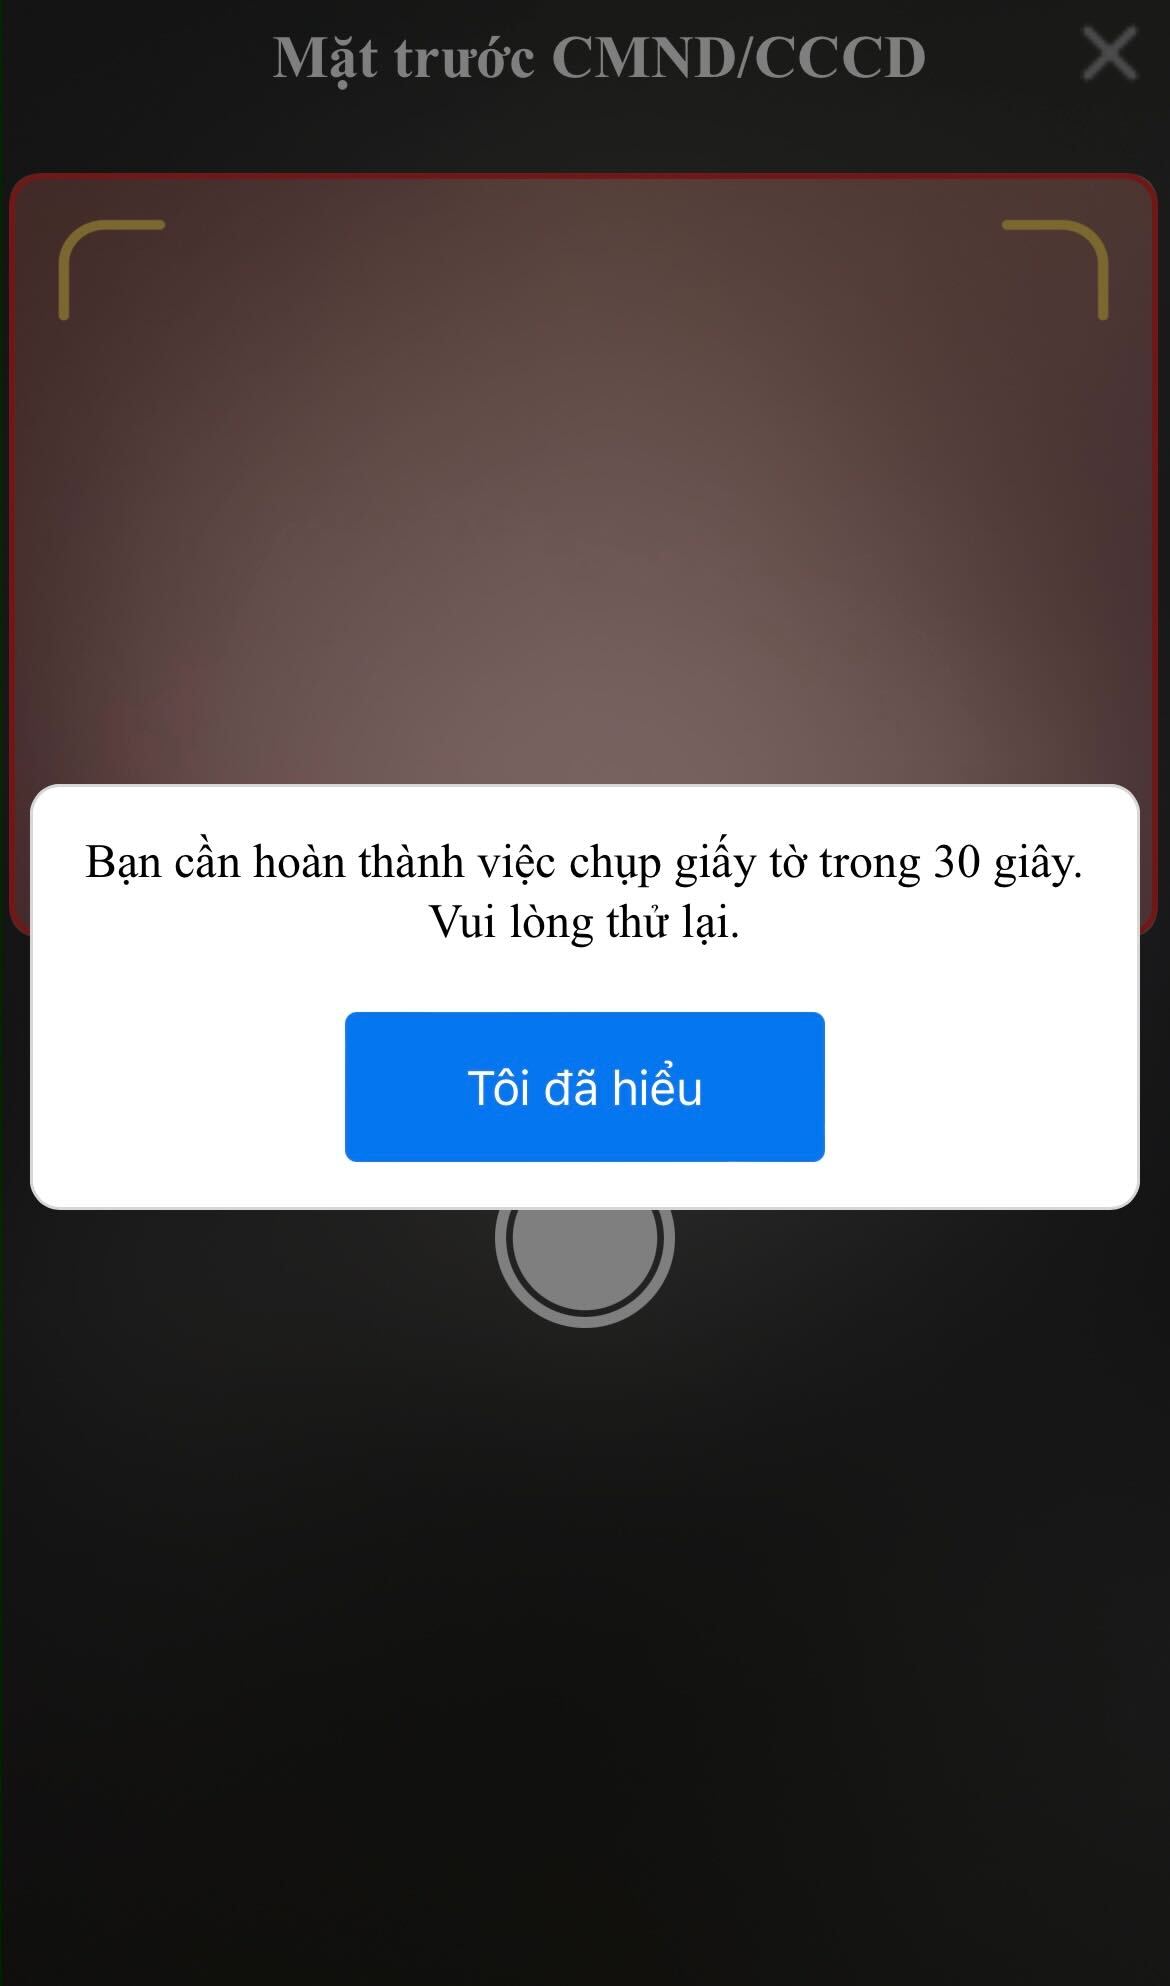
timeout_instruction | You need to take the picture within <%= x %> seconds. Please try again. | Bạn cần hoàn thành việc chụp giấy tờ trong <%= x %> giây. Vui lòng thử lại. | Necesita tomar la foto dentro de los siguientes <%= x %> segundos.\nPor favor, intente de nuevo | Must include <%= x %> as-is to show countdown |
warmup_intro | Warming up... Please wait a moment | Đang khởi động, vui lòng chờ trong giây lát... | Calentando, espere un momento | |
[TVWebSDK.Constants.FaceDirection.LEFT] | Turn your face to the left | Quay mặt chậm qua trái | Gira la cara a la izquierda | |
[TVWebSDK.Constants.FaceDirection.RIGHT] | Turn your face to the right | Quay mặt chậm qua phải | Gira la cara a la derecha | |
[TVWebSDK.Constants.FaceDirection.UP] | Turn your face up | Ngước mặt chậm lên trên | Inclina la cabeza hacia arriba | |
[TVWebSDK.Constants.FaceDirection.FRONTAL] | Look straight into the camera | Nhìn thẳng camera | Mira directamente a la cámara | |
qr_instructions_text | Please follow the instructions below to scan QR code:\n Move camera to the position of QR code on ID card. Align QR code to fit into camera frame to scan it | Vui lòng quét mã QR theo hướng dẫn sau:\n Đưa camera vào vị trí mã QR trên CCCD. Canh vừa mã QR vào 4 góc khung hình để quét mã | Mueva la cámara a la posición del código QR en la identificcion. Alinee el código QR para que encaje en el marco de la cámara y escanearlo | |
qr_instructions_start_button | Scan QR code | Escanear código QR | ||
qr_instructions_countdown | Start in <%= x %> s | Bắt đầu trong <%= x %> giây | Comienza en <%= x %> s | Must include <%= x %> as-is to show countdown |
qr_invalid_popup_title | Invalid QR code | QR không hợp lệ | ||
qr_invalid_popup_description | Please check and make sure scanning QR code on ID card | Vui lòng kiểm tra và đảm bảo việc thực hiện quét QR code trên CCCD thật | ¡QR inválido! Escanee el código QR en su iD. | |
qr_invalid_popup_retry_button | Scan QR (on ID card) | Quét lại QR (trên CCCD) | Inténtelo de nuevo | |
qr_invalid_popup_skip_button | Skip | Bỏ qua | Omitir | |
qr_tooltip | Fit QR code to 4 corners of camera frame and try to move camera [in or out] to scan QR code | Canh vừa mã QR vào 4 góc khung hình và thử dịch chuyển camera [xa - gần] để quét được mã QR | Coloque el código QR de la ID dentro del marco | |
session_timeout_popup_description | Scan time exceeded. Please try again.\n Position the camera at the QR code on the card. Align the four corners and try moving the camera [far - near] so that the phone camera can focus more accurately. | Quá thời gian quét. Vui lòng thực hiện lại.\n Đưa camera vào vị trí mã QR trên thẻ. Canh vừa vào 4 góc và thử dịch chuyển camera [xa - gần] để camera điện thoại lấy nét chuẩn hơn. | Tiempo de escaneo excedido. Inténtelo de nuevo.\nColoca la cámara sobre el código QR de la tarjeta. Alinea las cuatro esquinas e intenta mover la cámara (de lejos a cerca) para que la cámara del teléfono enfoque con mayor precisión. | |
session_timeout_popup_retry_button | Retry | Thử lại | Intente de nuevo | |
session_timeout_popup_skip_button | Skip | Bỏ qua | Omitir |
Usage example:
tv.readIDCardUIOnly({
  ... // others props
  customTexts: {
    front_card_title: 'My custom front card title',
    front_card_description: 'My custom front card description',
  }
});

tv.livenessDetection({
  ... // others props
  customTexts: {
    [TVWebSDK.Constants.FaceDirection.LEFT]: 'My custom turn left instruction',
    [TVWebSDK.Constants.FaceDirection.RIGHT]: 'My custom turn right instruction',
  }
});
Theme version
Only available from SDK version 5.19.0
This prop is used to change the theme of the SDK. The default theme is v2. The available themes are v1 and v2. Please see the images below for the differences between the two themes.
Default UI for v1


Default UI for v2


Browser compatibility
SDK works best on these major browsers (Chrome, Firefox, Safari):
Desktop
| IE | Edge | Firefox | Chrome | Safari | Opera |
|---|---|---|---|---|---|
| >11 | >79 | >36 | >53 | >11 | >40 |
Mobile
| iOS Safari | Facbook Web Browser in iOS | Facbook Web Browser in Android | Opera mini | Opera Mobile | Chrome for Android | Chrome for iOS | Firefox for Android | UC Browser for Android |
|---|---|---|---|---|---|---|---|---|
| >11 | not supported | not supported | not supported | >43, but there are some unexpected behaviors (browser ask to choose Front/Back camera) | >85 | iOS>=14.3 | >79 | not supported |
Please refer Browser compatibility on https://developer.mozilla.org/en-US/docs/Web/API/MediaDevices/getUserMedia for more information
Highly recommendations
The default settings use CDNs to deliver assets/resources to user browsers, but Vietnamese internet access to those CDNs may encounter issues sometimes. To prevent that and improve user experience, we highly recommend hosting those resources in Vietnam. Please check default custom urls and notes for self-hosted decision.
Possible error objects
not_supported: {
  code: 'not_supported',
  msg: {
    en: 'Camera is not well-supported on this device/browser. Please try another one.',
    vi: 'Camera không được hỗ trợ. Vui lòng thử trình duyệt hoặc thiết bị khác.',
  },
},
camera_timeout: {
  code: 'camera_timeout',
  msg: {
    en: `Can't access camera. Please check camera permission, try again or try another browser/device`,
    vi:
      'Không thể truy cập camera. Vui lòng kiểm tra quyền truy cập camera, đóng các tab/app khác đang sử dụng camera hoặc thử lại trên trình duyệt/thiết bị khác.',
  },
},
unable_to_load_model: {
  code: 'unable_to_load_model',
  msg: {
    en: `Unable to load model on this device/browser. Please try another one.`,
    vi: 'Không thể load model. Vui lòng thử trình duyệt hoặc thiết bị khác.',
  },
},
no_permission: {
  code: 'no_permission',
  msg: {
    en: 'Please grant the permission to access the camera.',
    vi: 'Vui lòng cấp quyền để truy cập camera.',
  },
},
api_call_error: {
  code: 'api_call_error',
  msg: {
    en: 'Api call error',
    vi: 'Lỗi call api',
  },
},
upload_error: {
  code: 'upload_error',
  msg: {
    en: 'Upload error',
    vi: 'Lỗi upload',
  },
},
sanity_check_error: {
  code: 'sanity_check_error',
  msg: {
    en: 'Sanity check error',
    vi: 'Lỗi check sanity',
  },
},
read_id_card_error: {
  code: 'read_id_card_error',
  msg: {
    en: 'Read id card error',
    vi: 'Lỗi read id card',
  },
},
detect_id_tampering_error: {
  code: 'detect_id_tampering_error',
  msg: {
    en: 'Detect id tampering error',
    vi: 'Lỗi detect id tampering',
  },
},
detect_id_card_error: {
  code: 'detect_id_card_error',
  msg: {
    en: `Can't detect id card type`,
    vi: 'Không thể detect id card type',
  },
},
missing_front_id_card: {
  code: 'missing_front_id_card',
  msg: {
    en: 'Missing front id',
    vi: 'Không tìm thấy front id',
  },
},
server_error: {
  code: 'server_error',
  msg: 'Server error',
},
not_readable: {
  code: 'CameraInUseError',
  msg: {
    vi: 'Camera đang được sử dụng bởi ứng dụng/tab khác.',
    en: 'Camera already in use by another app/tab.',
  },
},
invalid_card_type_config: {
  code: 'invalid_card_type_config',
  msg: {
    en: 'Invalid card type config',
    vi: 'Cấu hình loại thẻ không hợp lệ',
  },
},
max_retry_reached: {
  code: 'max_retry_reached',
  msg: {
    vi: 'Đã quá số lần thử',
    en: 'Maximum retries reached',
  },
},
sdk_timeout_reached: {
  code: 'sdk_timeout_reached',
  msg: {
    vi: 'Đã quá thời gian thực hiện',
    en: 'SDK timeout reached',
  },
},
license_invalid: {
  code: 'license_invalid',
  msg: {
    en: 'Invalid license',
    vi: 'License không hợp lệ',
  },
},
license_rate_limit_exceeded: {
  code: 'license_rate_limit_exceeded',
  msg: {
    en: 'Invalid license',
    vi: 'Quá số lần thử',
  },
},
license_internal_server_error: {
  code: 'license_internal_server_error',
  msg: {
    en: 'Internal server error',
    vi: 'Lỗi server',
  },
},
license_unknown_error: {
  code: 'license_unknown_error',
  msg: {
    en: 'Unknown error',
    vi: 'Lỗi không xác định',
  },
},
{
  code: < DOMException > // refer: https://developer.mozilla.org/en-US/docs/Web/API/MediaDevices/getUserMedia#Exceptions
}
Errors can be found in TVWebSDK.Constants.Errors
FAQs
1. Why am I getting license_invalid error?
This error happens when you haven't set up the license key correctly. Please make sure all of the following conditions are met:
- You have passed the parameter
clientSettingscorrectly to the method.clientSettingsshould have this similar shape:
const clientSettings = {
  data: {
    settings: {
      sdk_settings: {
        // Your settings including license key
      },
    },
  },
};
- The domain you are using to run the SDK is added to the allowed domains list for that license key, including
localhost. You can check the domain you are on usingwindow.location.hostname.
